My Triumph Bonneville project began with a basic desire for a more interesting exhaust. After exploring lots of options, I landed on the Arrow side pipe exhaust meant for the Triumph Scrambler. It was the centerpiece of my design, but as one might expect, mounting an exhaust on a bike it wasn’t quite designed for is a lot easier to do in Photoshop than on the actual bike.
I ordered the Arrow and started looking into what it would take to make it work on my motorcycle. I knew I’d need a rear hanger of some sort, as on the actual Scrambler there’s a welded tab on the rear subframe under the seat. I’d need to swap out the right side cover for the Scrambler part with its heat shield, and I knew that’d probably mean swapping out a bracket underneath. Going into it, that’s about all the info I had, but I was fine with that. I’d wing it. The Scrambler and the Bonneville are about 85% identical, so I figured it couldn’t be that hard.
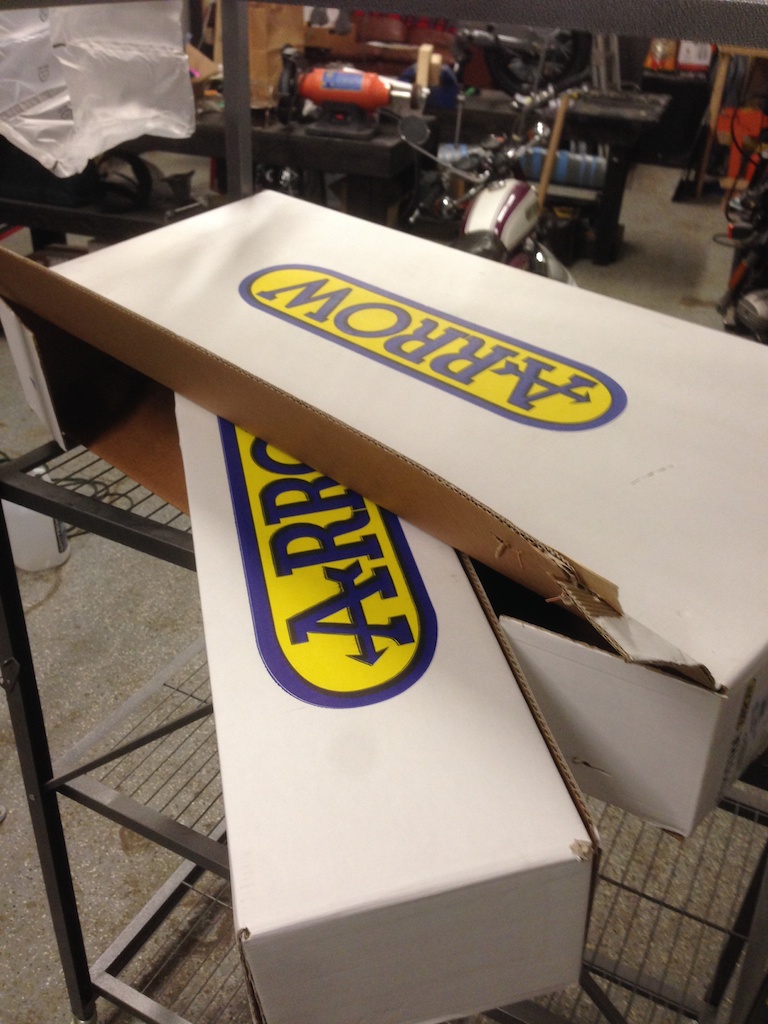
When my pipe arrived, the shop felt a little bit electric. Sure, my GL1100 project was still up on my lift, but this would be a nice little side project. No big deal. Nothing too involved, right? I unboxed the Arrow, and what struck me first was the quality of the parts. From the brushed stainless steel finish, to the precision fit of the parts, to the gorgeous, tight little TIG joints at the rear of the pipe; Arrow’s premium price point made a lot of sense. Even the optional oxygen censor block off bolts were gorgeous little anodized bolts with machined details. The pipe was also astonishingly lightweight. Online, the Arrow claims a 70% weight reduction over the stock Scrambler pipe. I believe it. Compared to the twin stock Bonneville pipes, I’d wager it’s an even bigger difference.
With my parts laid out, I paused for a second and just stared at the Bonneville. Was I really about to do this? Was I really about to tear into a brand new motorcycle? Yes! Yes I was. I grabbed my tools and started unbolting the OEM two-into-two system from the Bonneville. The stock system is actually pretty attractive. With its frame-hugging headers and reverse cone silencers, it’s a nice, classic look.
With a bit of wrestling and careful rubber mallet work, the stock system finally came free, providing me with a small cache of rubber grommets, plus bolts and washers. I retained these, pretty sure I’d need them since the exhaust I was about to put on would be counting on hardware from a different stock system — a system I didn’t have.
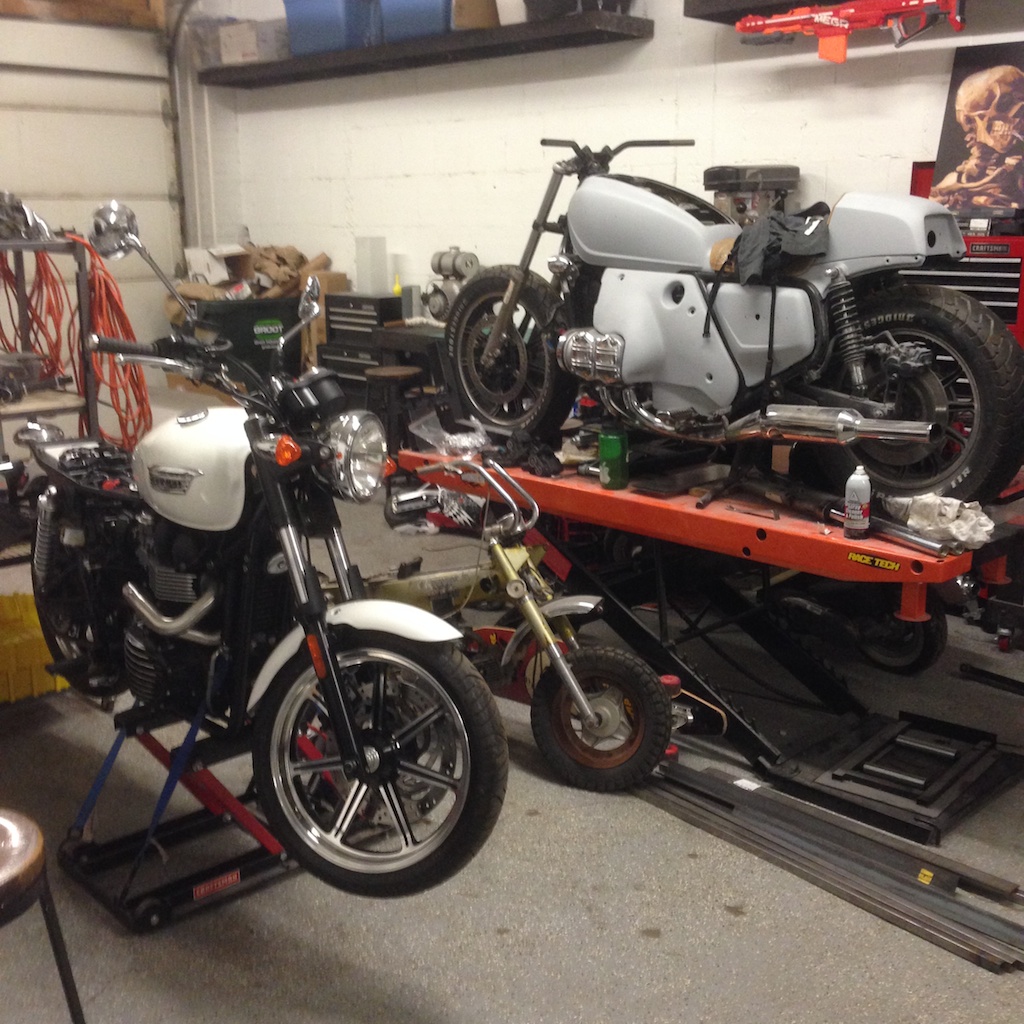
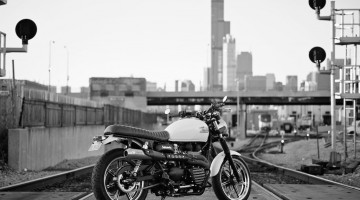
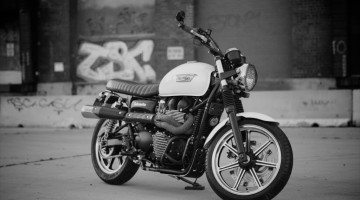
With the big twin pipes off the Bonneville, I stepped back and took a good look at the bike. I immediately knew I was onto something. It was like seeing the motorcycle for the first time. Without those big chrome header pipes either side of the frame, the Bonneville was revealed for the small bike it really is. I could see its ribs.
Because of the mag wheels, the standard Bonneville already sits a little lower than the other bikes in the Bonneville lineup. With that big exhaust removed, the whole visual stance of the bike changed for the better. It was not only low but now narrow. The bike’s front profile was now more of a vertical teardrop with the tank at the top and the narrow frame beneath wrapped around that iconic Bonneville engine. Because the bike’s overall proportions had shrunk, it made its other key details — the wheels, the tank, the side covers, and especially the engine — actually look bigger. The frame was like a perfectly fitted shirt over the bike’s musculature previously hidden under a layer of chrome.
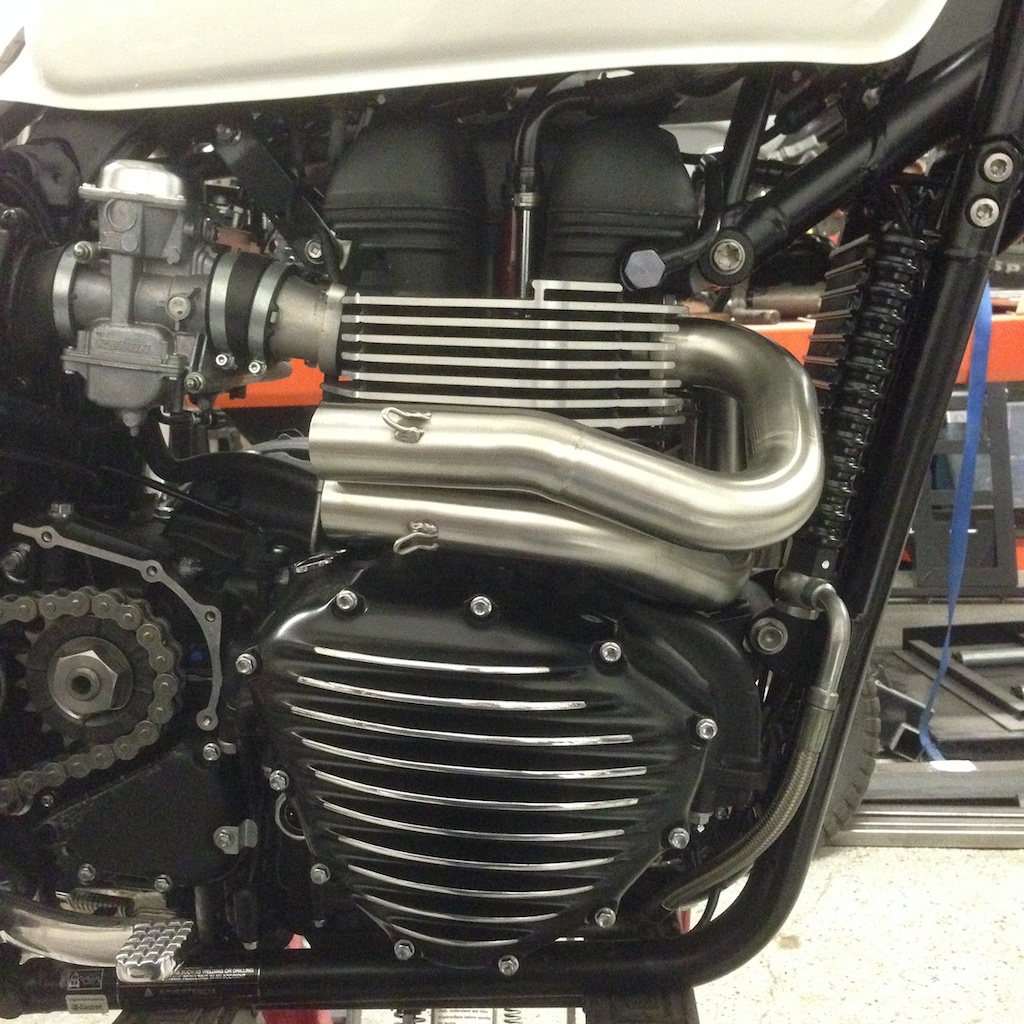
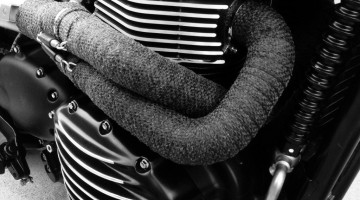
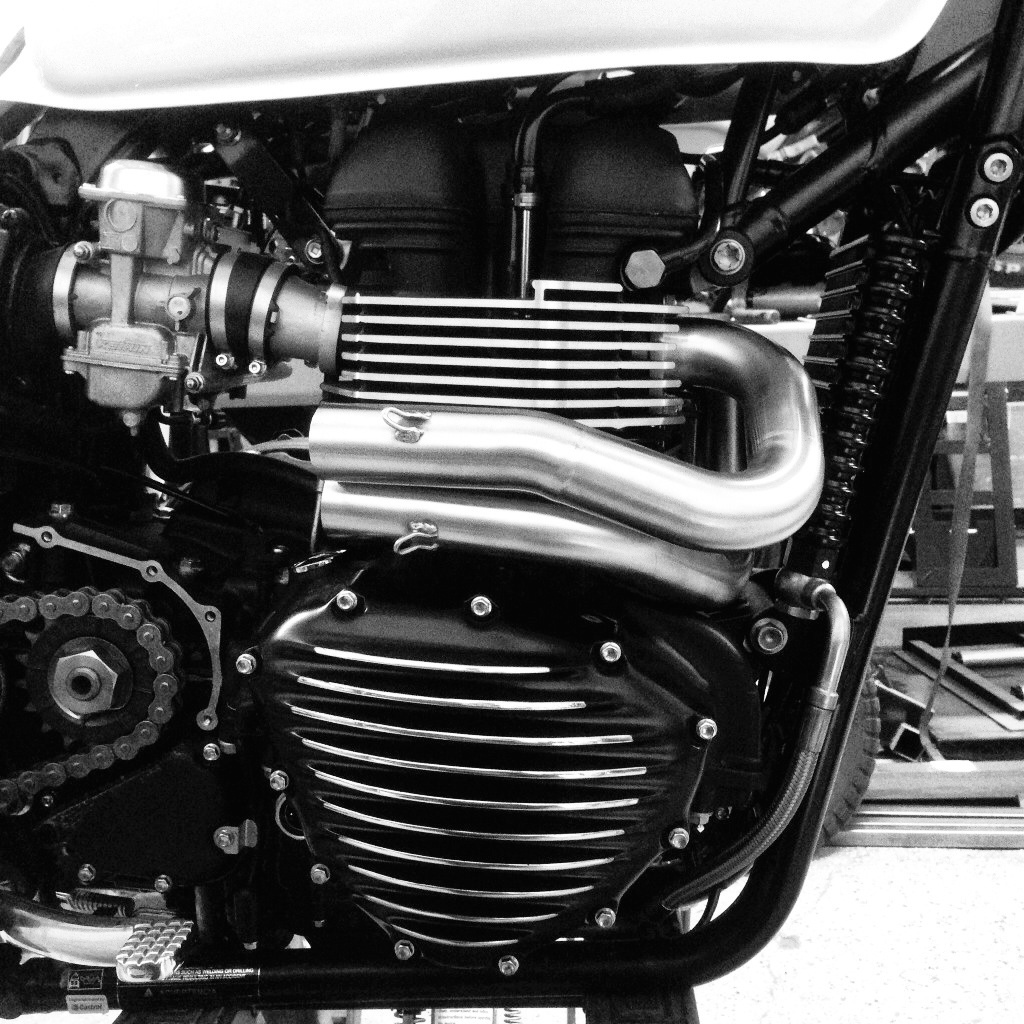
The next step was mocking in the Arrow headers. I’d eventually wrap the header pipes, but for now I just wanted to make sure everything would fit and work. The Arrow pipe comes in three main components. There are the two header pipes, an extension pipe with a two-into-one junction, and finally the silencer. Starting with the headers, it wasn’t immediately obvious which pipe went over which, so it took a couple tries before I had one header pipe properly looped over the other and everything aligning as it should be. The mid section, aft of the junction, has the system’s first mounting tab TIG welded onto its underside. This tab includes a cylinder to house the mounting rubber, then the mounting bolt goes through a grommet. Time to see if this mounting point was bolt-on here on the standard Bonneville.

Before I could attempt to fit that second section, however, I needed to swap out for the Scrambler side cover to make room. I removed the stock side cover, and looked at the Scrambler components I’d ordered along with the pipe. The smaller Scrambler side cover, with its integrated heat shield, required a different under-bracket on the bike’s frame in order to accept the different mounting style of that smaller side cover. This bracket was also the new mounting point for the fuse box. A few bolts later, the new bracket was in and the Scrambler side cover would slide on no problem.
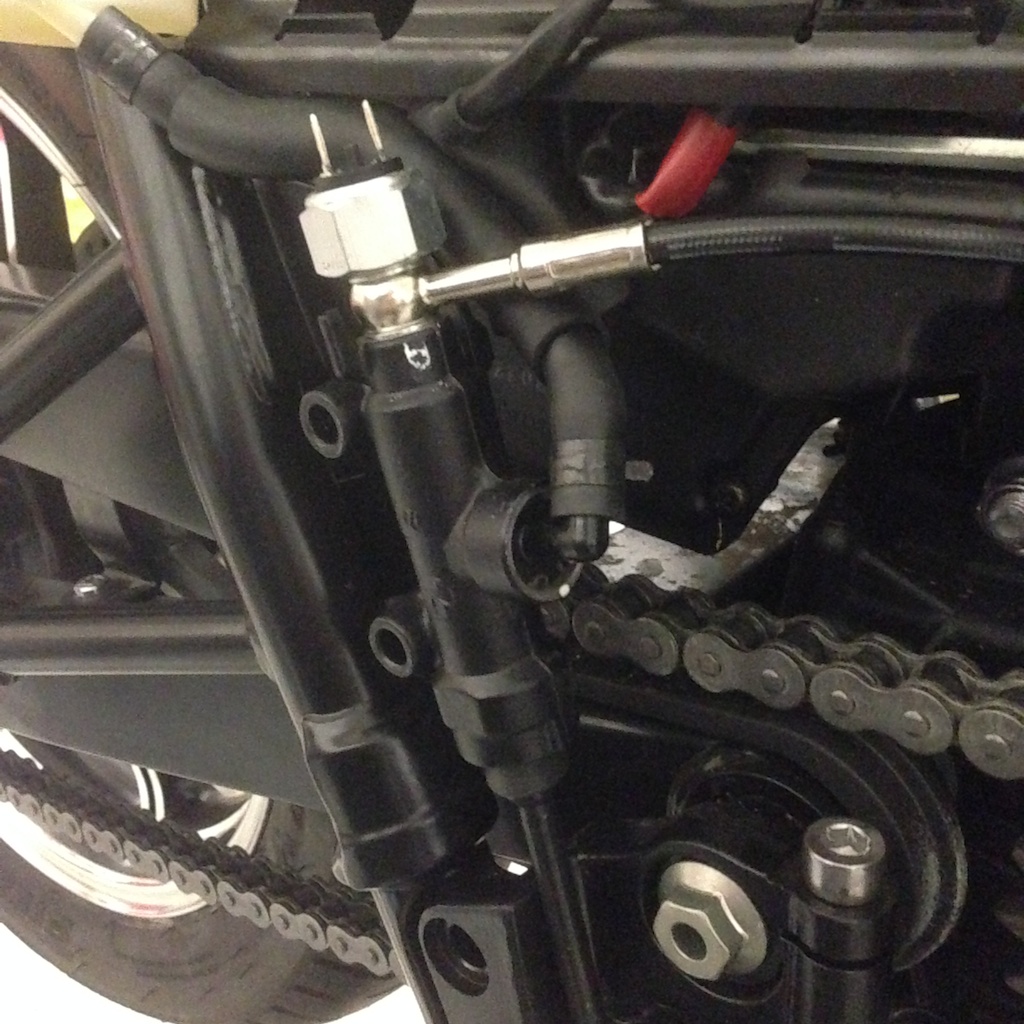
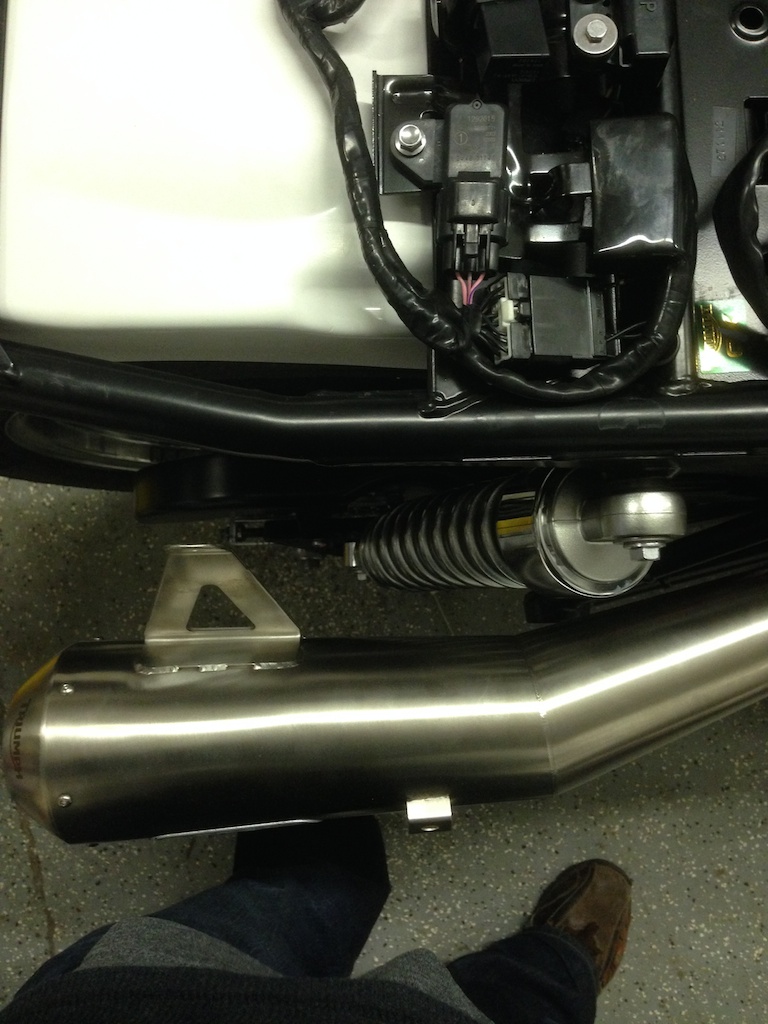
However, as easy as that was, a real problem became immediately apparent. The rear brake master cylinder was mounted right where the center section of the pipe needed to go. There’d be no fudging it either. It’d have to be relocated, or worse, replaced with the unit off the Scrambler, which attaches behind and under the right foot peg. I figured this might have some interesting domino effects, but for now, I had to simply focus on the task at hand. Let’s get this pipe mocked up and see if it even fits in the first place.
I unbolted the rear master cylinder and disconnected the electrics from the hydraulic brake switch. Its connector’s short lead wires placed it squarely in harm’s way should things start getting hot. Wherever the MC got relocated, I’d need to extend the connector’s reach as well. More complication. For the time being though, I unbolted the side cover bracket, tucked the connector behind it, and moved forward. For now, I just wouldn’t have a rear brake. That’d have to wait. One problem at a time.
With all those pesky parts out of my way for the moment, I placed the pipe’s second section into the junction to see if its mounting tab lined up with anything on the Bonneville’s frame. Sure enough, there was a perfectly positioned, threaded mounting hole in the frame. I dug through the Arrow’s hardware to see if there was any mounting rubber or bolt meant for this location. No joy. Those parts were intended to come from the stock Scrambler exhaust. Thankfully though, I’d retained all the hardware from the stock Bonneville exhaust and was able to use two grommets and a different mounting bolt to engineer a good mounting arrangement. Honestly, I love this kind of improvisation. It’s fun figuring out ways to do something right even when you’re not doing something stock.
With two of the three main sections on the bike now, I could already see that bold side line starting to take shape. I slid the final section — the silencer — onto the pipe, carefully letting it rest under its own weight in the junction. With just a friction fit, I’d snugged the headers and center section to create a good anchor for the silencer so that nothing would get bent. With no hanger back there yet to take the weight, I wanted to be careful not to put too much strain on the components. Thankfully, these components are really light.
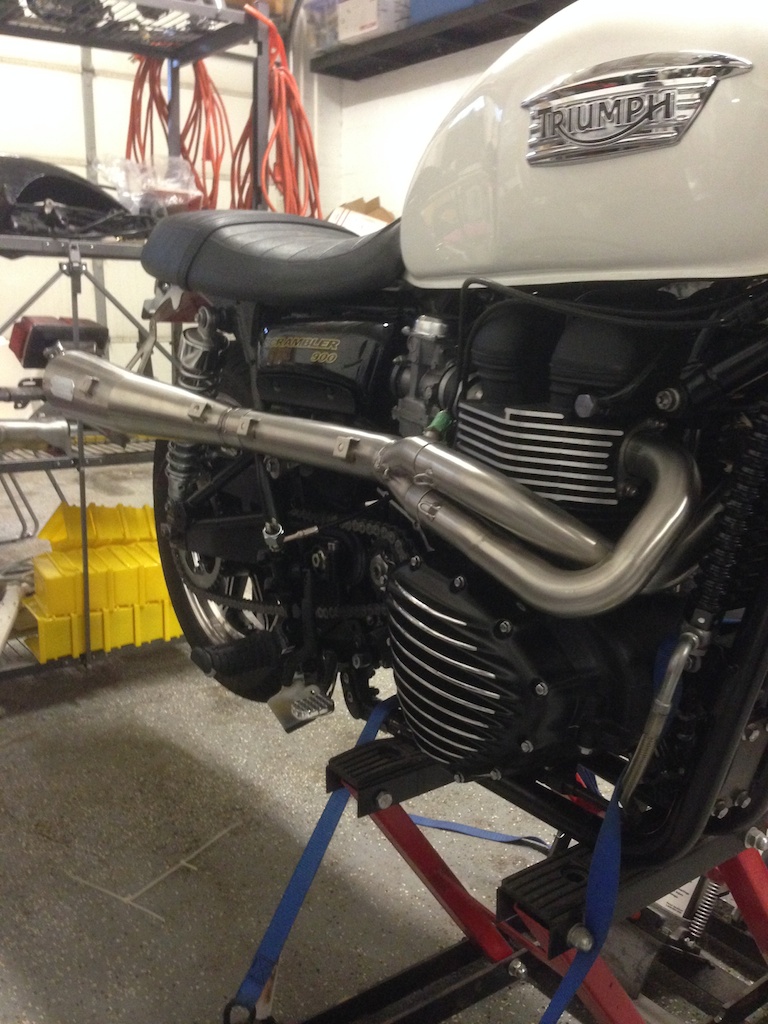
Standing back, the result looked fantastic, even in this rough draft. The side pipe hugged the Bonneville’s flank, and the result was as compelling as I’d hoped it would be from my initial Photoshop rendering. It made the bike look fast, even at a standstill. Even without the heat shields or the wrap on the headers to blend it in further, the visual line created by the pipe felt perfectly integrated into the bike — as though it’d been designed for this machine, not the other.
Yet with visual victory had come some casualties of complication. I had no usable rear brake now. There would be the expense, effort and time it’d take to re-engineer that, but it also meant that the Bonneville wouldn’t be rideable until both the pipe and the brake were both completed. The dominos had started to fall. Do I turn back now and go a different direction? The thought crossed my mind, but looking at that gorgeous piece of stainless steel hanging off the side of my Bonneville, the complication seemed worth it already.
Standing there, looking at the bike, I figured there was only one way to decide. Forward or back? I pulled the gold plugs from the pipe’s center section and screwed in the Bonneville’s O2 sensors. I tucked the last few loose wires back out of the way and gave the silencer a good, firm push into the center pipe. Key in. Power on. I pulled in the clutch and hit the starter button. The bike fired to life, and I mean fired. It growled. It snarled.
Yeah, we’re moving forward.
…to be continued.