

With more than ten years on the air, Mythbusters remains on of my favorite shows. Besides the sheer entertainment value of building elaborate rigs and occasionally blowing shit up, I appreciate Mythbusters because it’s a show grounded in making things and exploring ideas. It’s that first aspect — the making of things — that keeps me coming back to the show. They wanted to figure out if one can get a ping pong ball going fast enough to be lethal, but how do you test that? That’s the kind problems that the show’s hosts, Adam Savage and Jamie Hyneman, solve each week. Yet beyond subject matter, therein lies what I believe to be the show’s secret sauce. Adam and Jamie are not simply hosts. They’re builders. In fact, they were builders first. They decide how they’re going to test a given myth, and they build the rigs that carry out their experiments. In the case of that ping pong ball, they figured out how to make it go supersonic. Spoiler alert: still not lethal.
Yet for as much as I love the show, I’ve become an even bigger fan of Adam and Jamie outside of the show. Between Adam’s TED talks and Maker Faire keynotes and Jamie’s escapades into electric vehicles and other engineering challenges, I’ve come to really respect and admire what these guys do with their off-air time. Adam in particular has inspired a lot of what I do in the Salzmoto shop. His shameless love of costumes and replica movie props is something I can relate to. In particular, I love Adam’s obsessive attention to detail in the things he builds for fun. For example, his decades-long quest to build the perfect replica of Deckard’s pistol from Blade Runner.
My own love of objects has produced a very long list of things I’d love to replicate. One of those things is actually the steel sign from Mythbusters itself. That sign has become the iconic symbol for the show, and is used on-camera in conjunction with other signs that read “Busted”, “Plausible” and “Confirmed”. They’ve become a key part of the show itself and the Mythbusters sign in particular is something I’ve wanted to have hanging in my shop for a long time.
So a few weeks back the idea of making a Mythbusters sign of my own occurred to me as a simple little project I could do quickly in my shop. Aside from the object itself, the biggest appeal in taking on this project is precisely how small in scope it really is. I have a lot of projects ongoing and a lot of balls in the air, so it’s actually been a while since I really finished something. My Bonneville project took up six months of 2014, and the euphoria of finishing it was pretty spectacular. That’s a dragon I want to chase quite a bit more often than I have been of late.
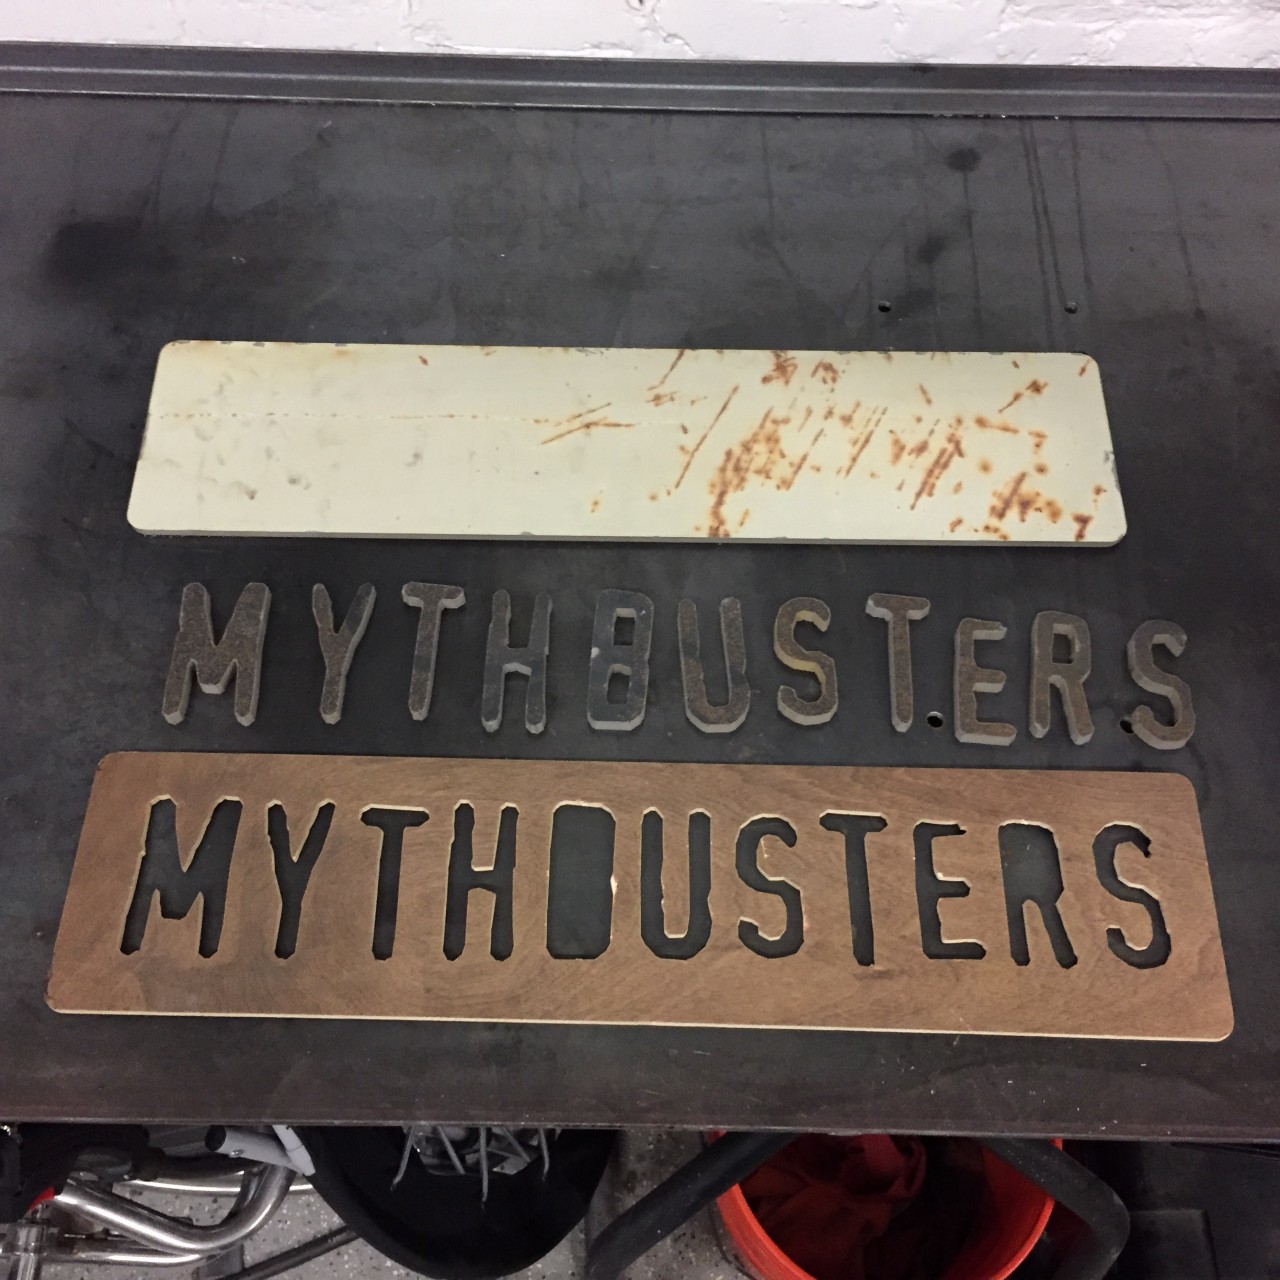
In that vein, a couple weeks ago I reached out to a buddy of mine who runs a water jet and fabrication business. I sent him a vector file of the letters for the Mythbusters sign and sized it based on another fan replica I’d seen on the Replica Prop Forum (the RPF for short). The reason I wanted to water jet the letters was two-fold. First, I wanted my sign to be accurate. I wanted it to look as much like the sign seen on TV as possible. Second, I simply didn’t want to cut all those letters out by hand (and I don’t have a plasma cutter). Sure, I could park my ass in front of a band saw for eight hours and punch out all those letters with the degree of precision I wanted, but given I only get a few precious hours a week in my shop as it is, that’s not how I wanted to spend them. So I figured I’d let the heavy machinery do the tedious part for me.
I selected 3/8″ steel plate for both the background and the letters. At 24″ wide, these proportions of thickness felt right. I wanted the letters to be tall enough so that my MIG welds would sit comfortably in the corners and not come up flush with the top. This would help the letters have the best possible contrast and definition against the background.

Also, making the whole thing out of steel, for me, was critical to my love of the object. Sure, I could have taken the same route as the individual on the RPF and made a replica out of foam board and painted it to look like the Mythbusters sign. It would have been cheaper. However, it certainly wouldn’t have taken less time. Most of all, I wanted the satisfaction of the sign’s weight. The real sign is heavy. It’s substantial. It’s covered in surface rust and welding slag. I wanted my sign to be a reproduction, not just a replica.
The more I think about future replica projects, there’s a boundary there that feels really critical for me. I see a lot of makers building video game weapons out of MDF and Bondo and then painting them to look like weathered metal. There’s nothing wrong with that. Those pieces look amazing in photographs and I can certainly imagine that the finished result is very satisfying to look at. Yet, I can’t help but feel like any object made out of MDF or cast resin and then painted to look metal isn’t going to feel as satisfying as that same object made out of metal.
For example, there’s a beautiful replica of Mjolnir, Thor’s hammer from the Marvel movies, available online. It’s not cheap. It’s several hundred dollars, actually. It’s also made from cast resin and made to look like steel. That just seems wrong to me. What good is a plastic hammer? Sure, I know it doesn’t plant itself in rock like Excalibur or shoot lightning, but it’s still grounded in the idea of being a hammer. There’s a lot I don’t like about the Mjolnir replica made on Man at Arms, but at least it’s made out of actual steel. That seems like a step in the right direction. (and yes, I’m going to build my own Mjolnir replica)
I digress. For my Mythbusters sign, it was going to be made of actual steel. With actual welds and actual rust giving it a level of authenticity I knew I just couldn’t get out of foam board and paint.
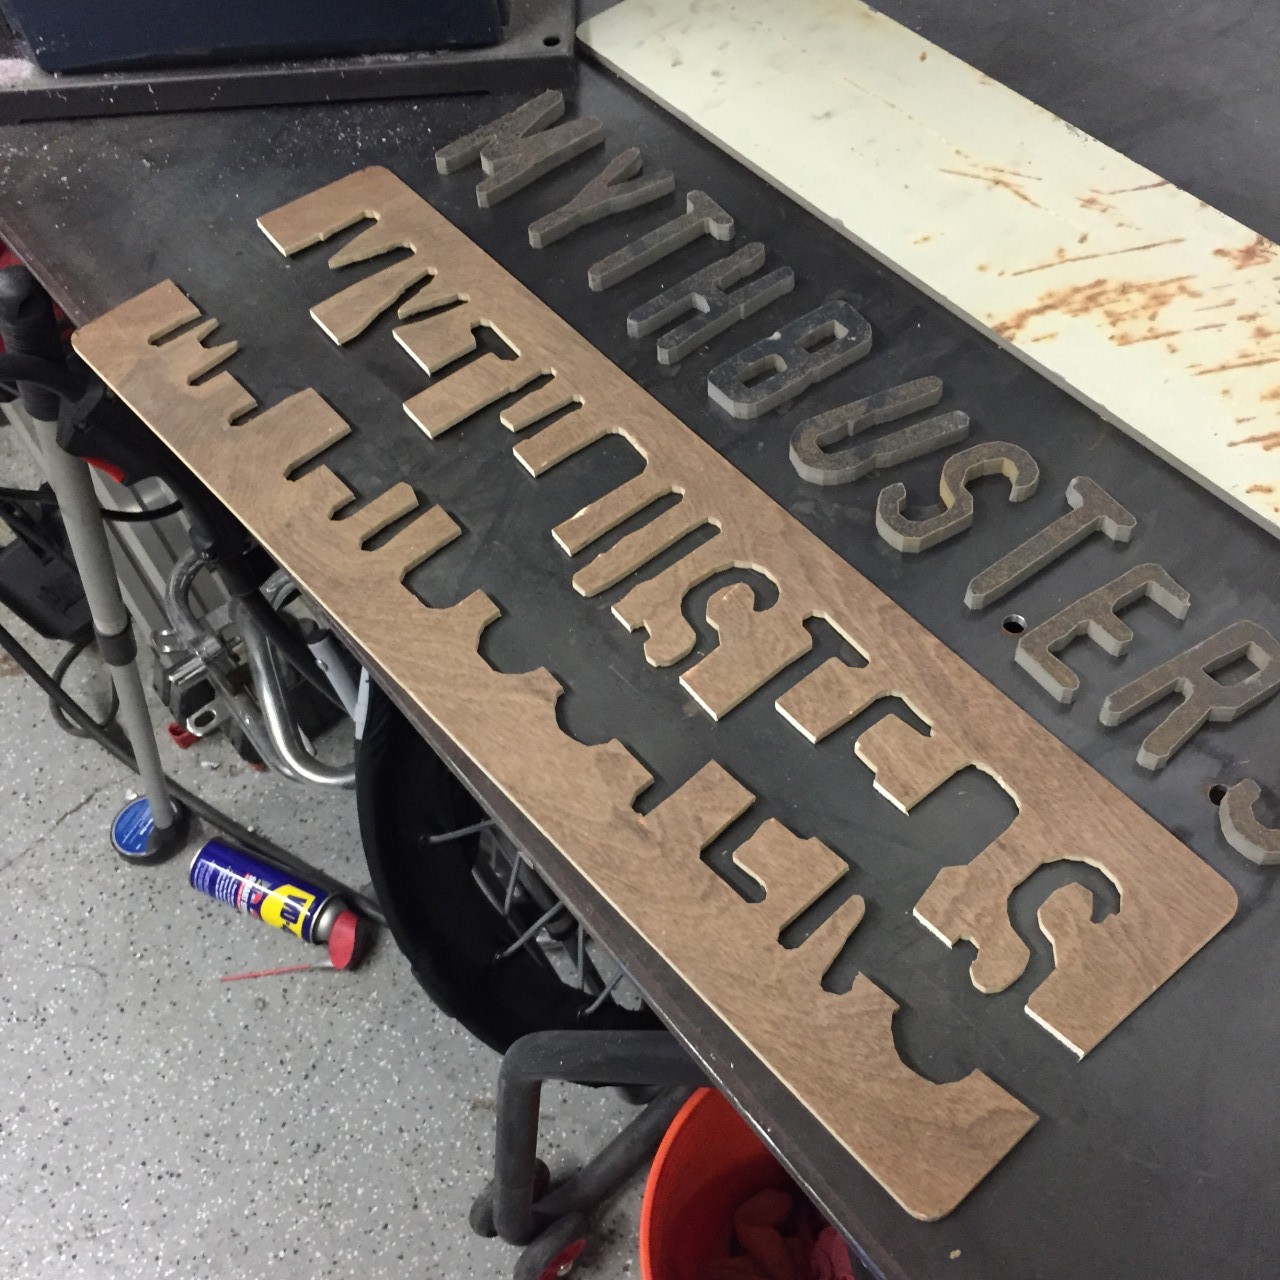
My letters and base plate arrived in the mail just a few days ago, and with it, I received a 1/4″ masonite stencil that’d been water jet cut from the same file. This stencil was important because it would ensure accurate placement and alignment of each letter. With those three items in hand, I headed to the shop and cleaned off my welding table.
The first order of business was to make the stencil more usable. I pulled out my trusty little band saw and went to work basically sawing the stencil in half. This would let me align each letter, but give me plenty of room to do my tack welds without setting my stencil on fire.
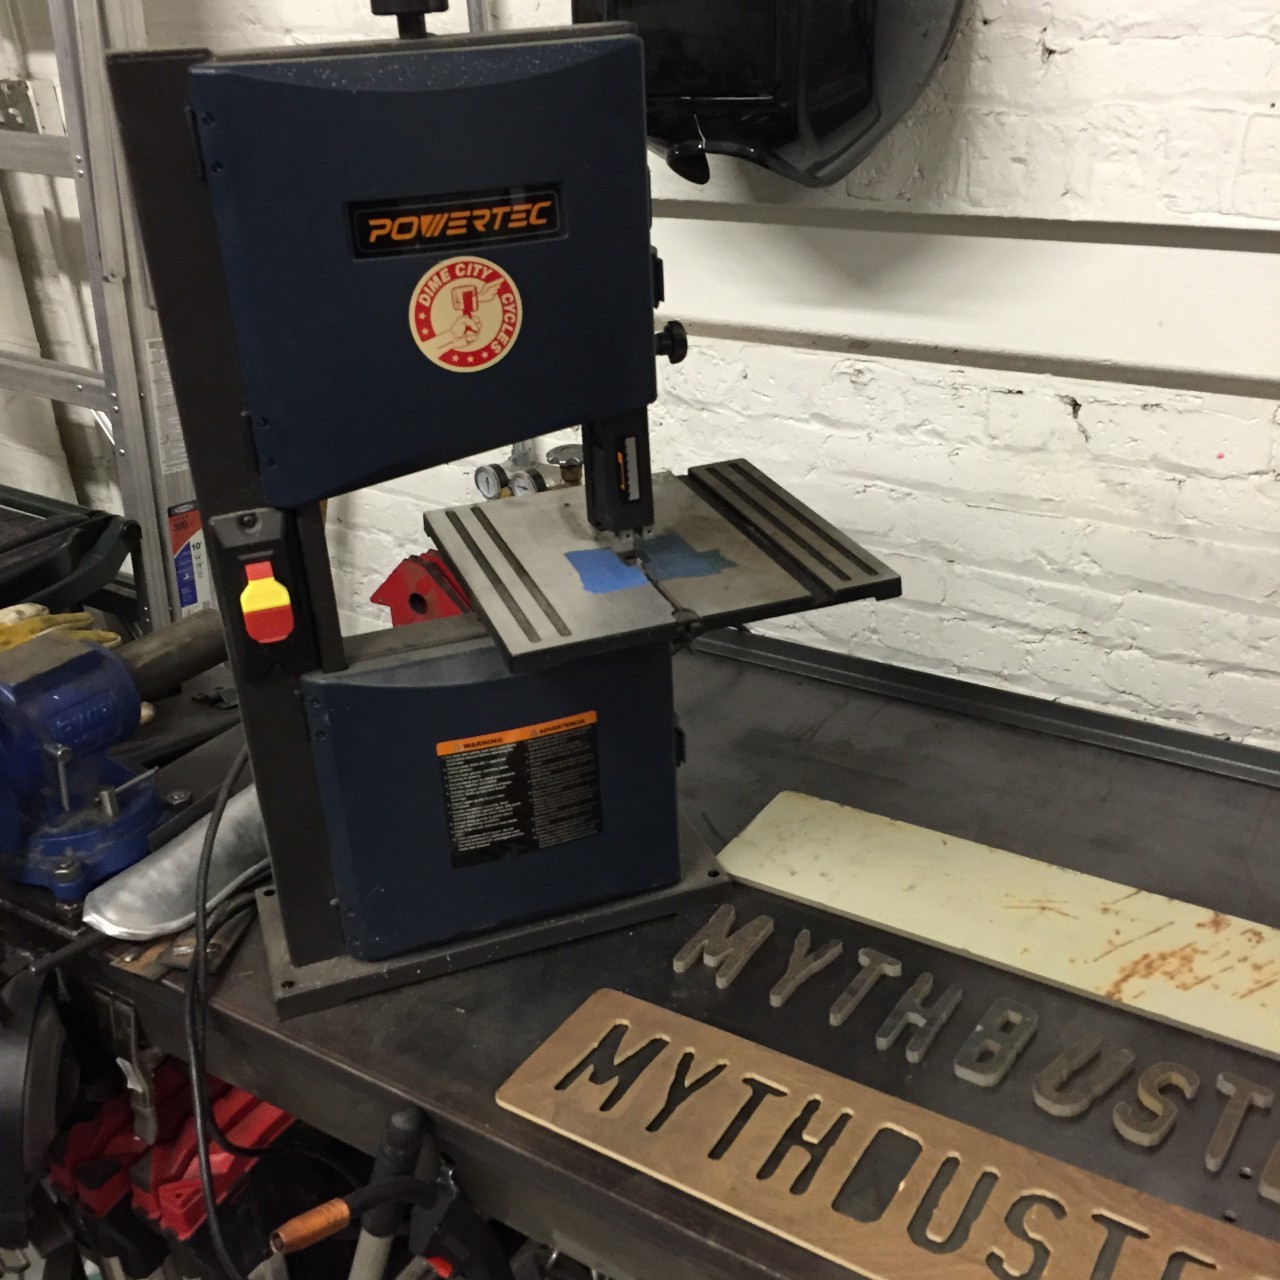
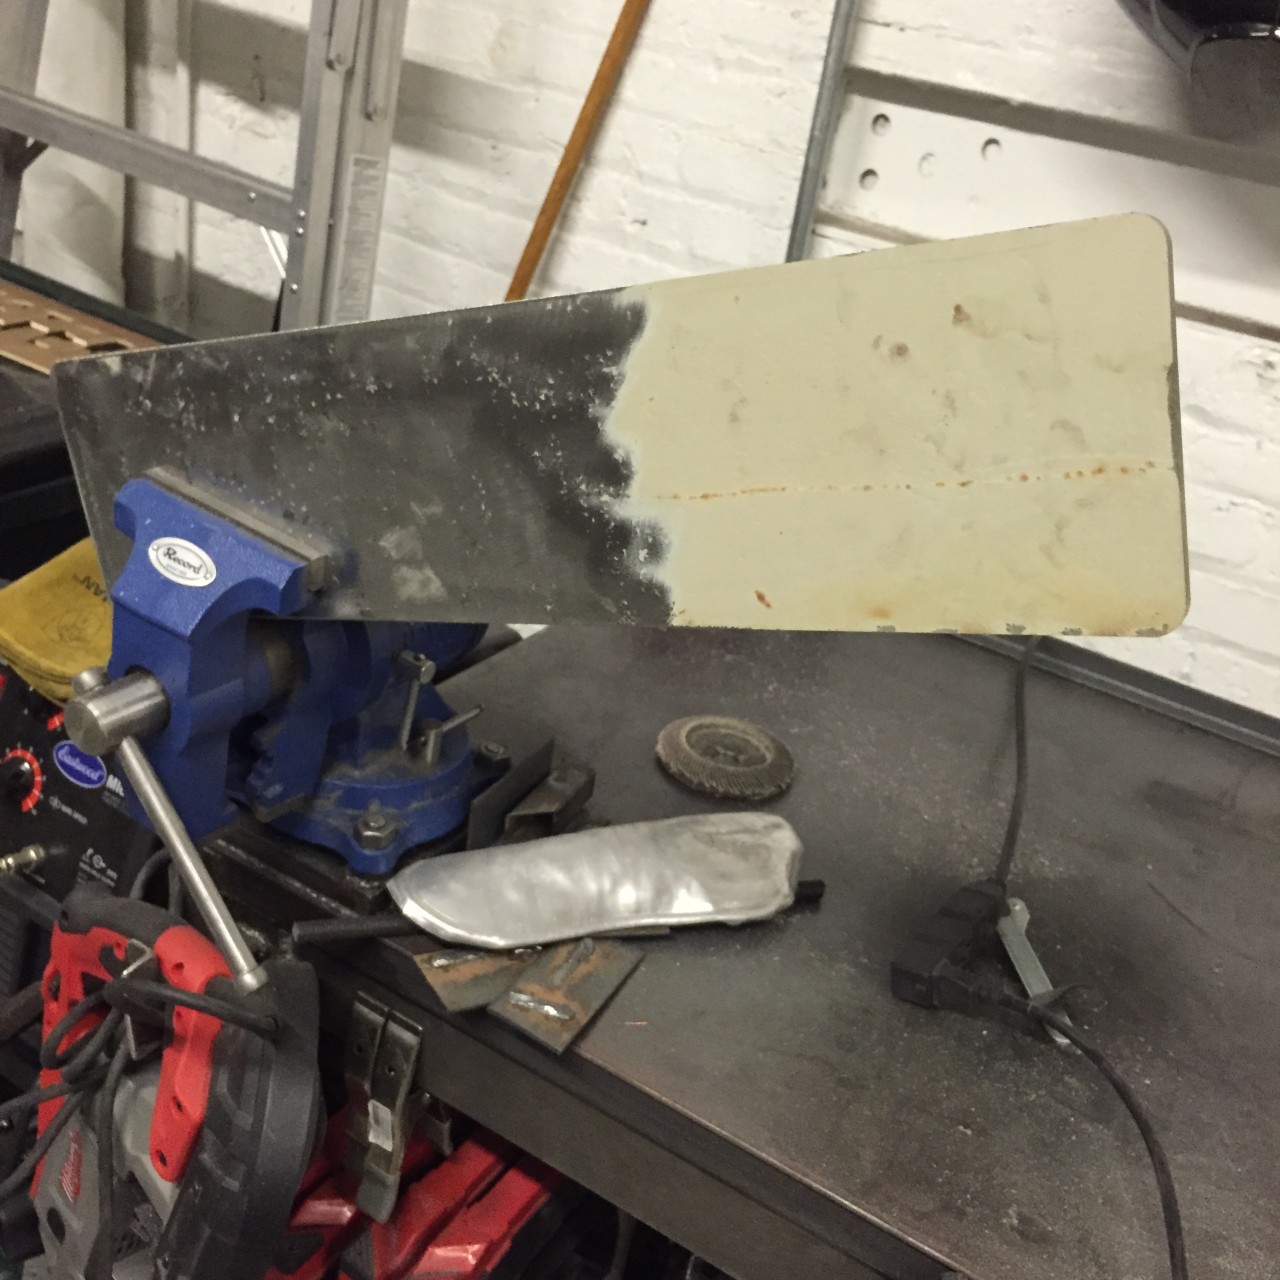
The next key step was to prep the surface of my base plate for welding. The edges of the letter were still nice and clean from the water jet, so my only real prep work was to strip the protective coating that was left on my base plate. For this I used my trusty flap wheel in my 4-1/2″ side grinder.
With the plate held solid in my bench vice, I sanded down first one end, then the other until I had a nice, shiny surface.
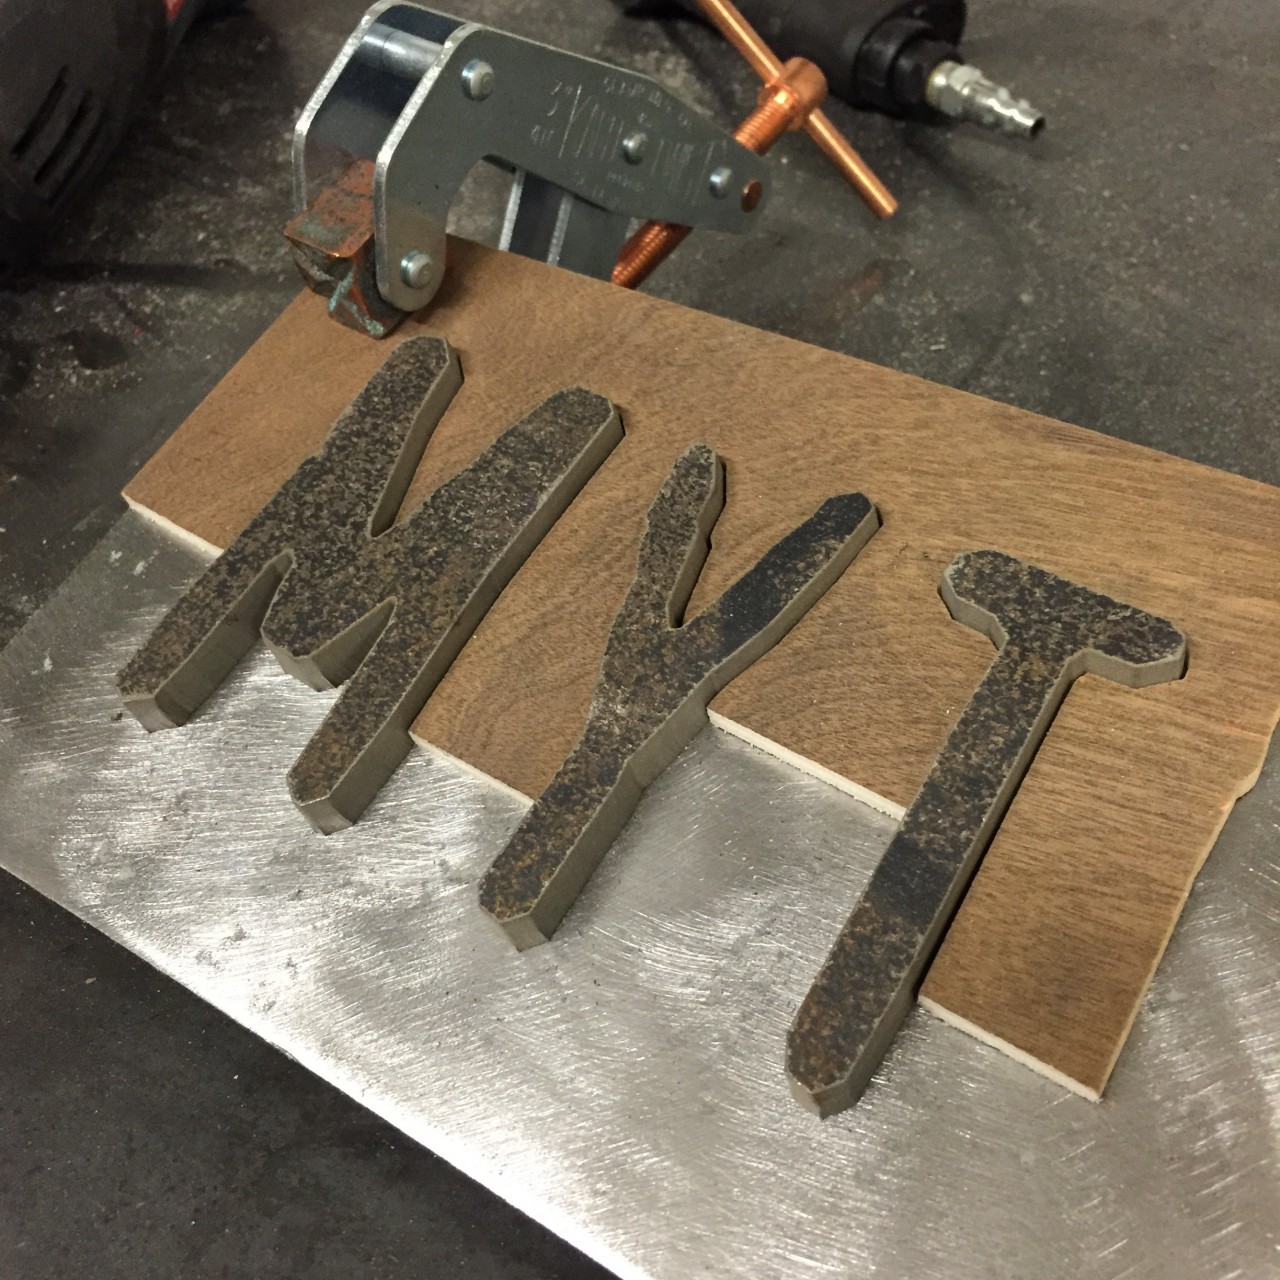
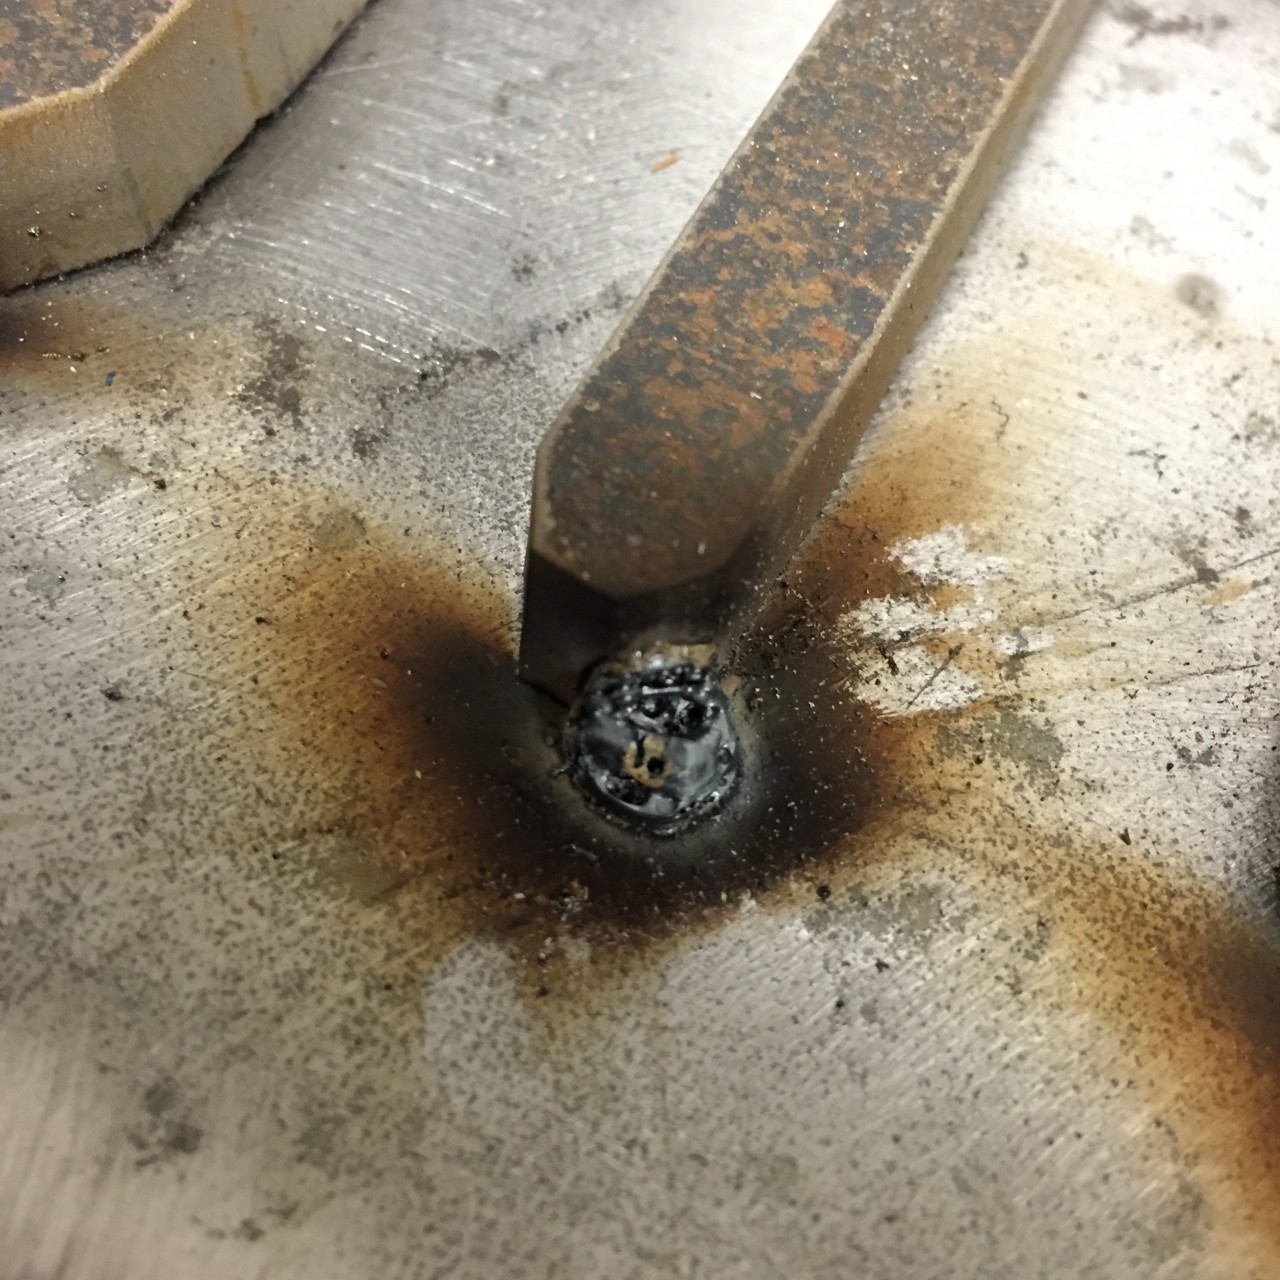
Next I used a pair of kant-twist machinist clamps to gently but firmly secure the stencil to the backing plate. I placed the first couple of letters and started tacking down the bottom edges. Right away I had a problem. My welds were really porous. It was then that I remembered that I haven’t actually gotten my MIG welder fully dialed in since switching it over to 220V. Previously I’d been running flux-core wire without shielding gas and cheating to run my welder on 120V. It worked, but barely. Now that I’ve got the full 220V to work with, it would appear my shielding gas setup isn’t working as well as I’d like. For this project, however, ugly welds are fine. In fact, the Mythbusters sign we see on TV is such a rough piece, these ugly welds seemed appropriate. I just wish I could say they looked that way on purpose.
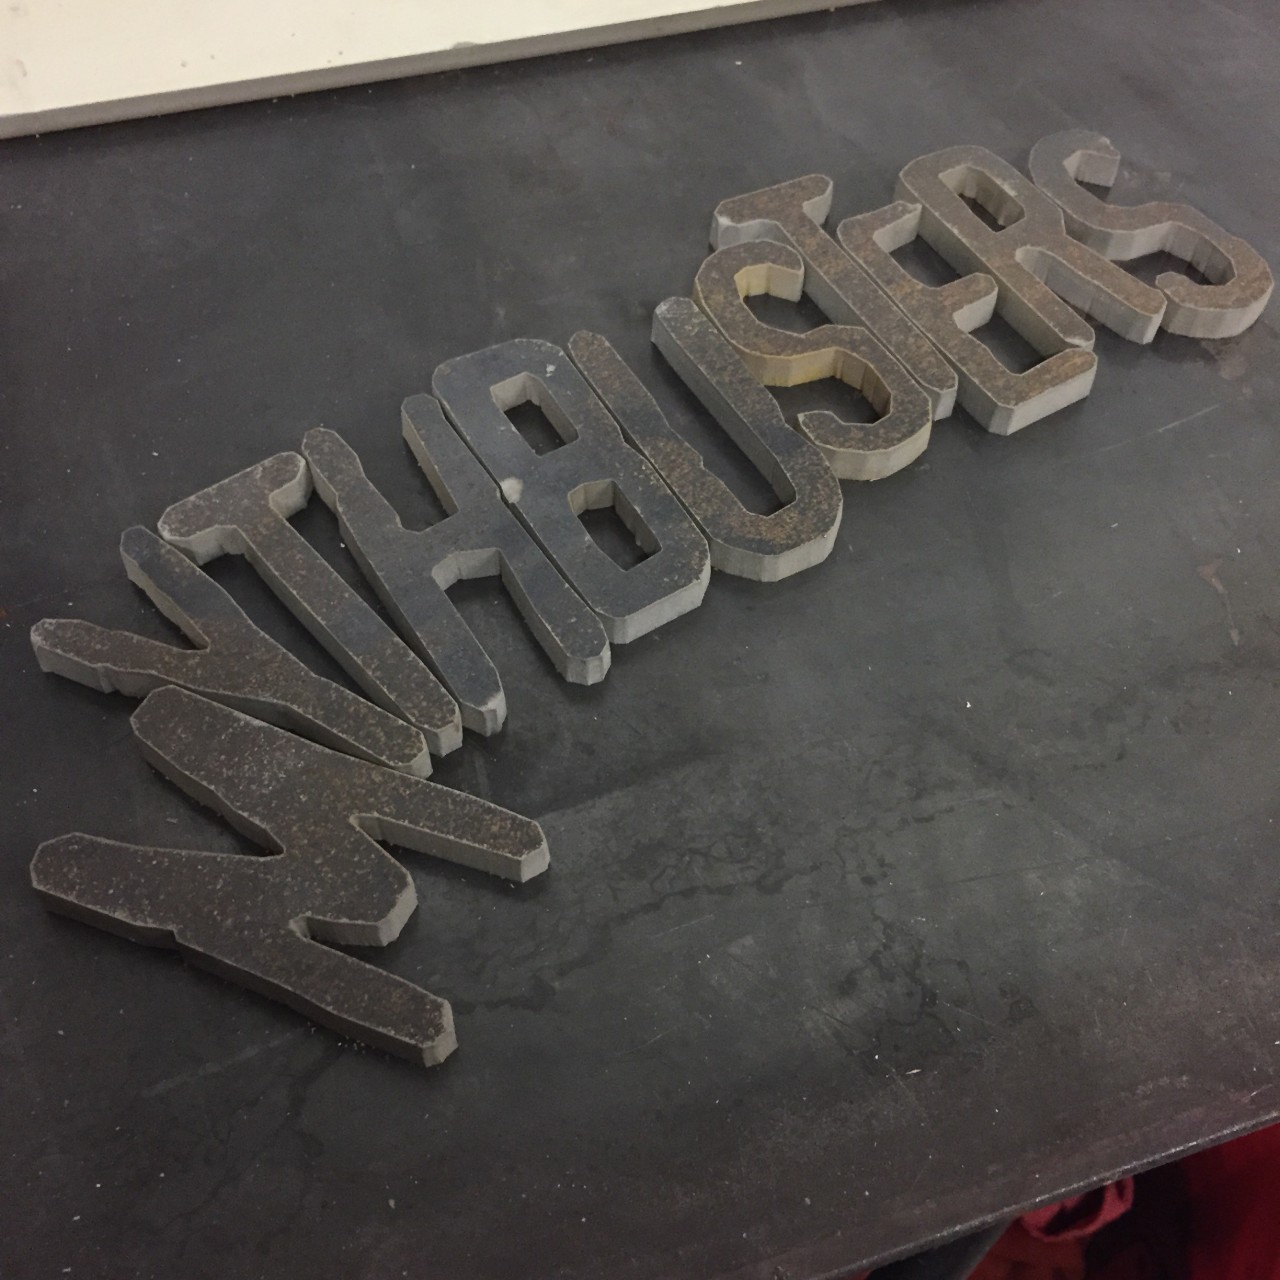
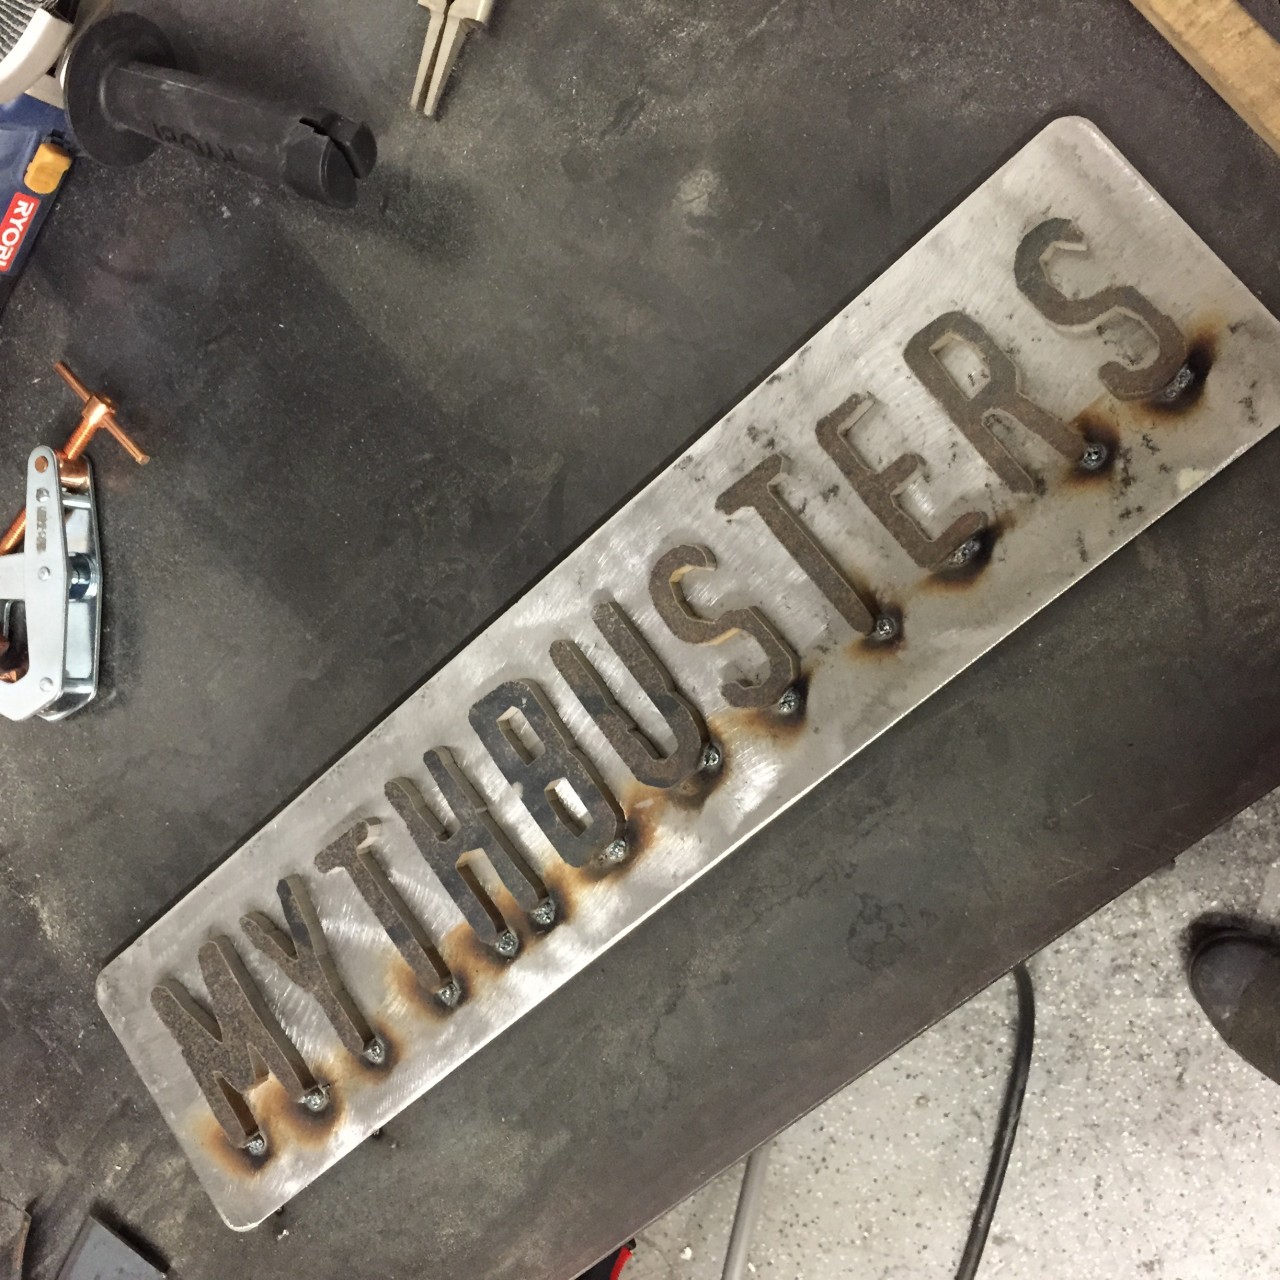
I continued down the line, placing each letter and tacking it in place. Once each was set in its place, I removed the stencil and spun the plate around, tacking the top of each letter for good measure. Then began the hot, tedious task of MIG welding the outline of each letter. I decided to just weld parallel surfaces from letter to letter and work my way across the sign. I’d then flip the sign around and work the opposite edges back across the sign and then tidy up.
As I worked each weld, I found my welds looked quite a bit better if I simply moved a little slower. They still weren’t perfect, and if I lingered too long I’d start penetrating way too deep into the metal underneath, but I landed on a somewhat consistent, appropriately sloppy weld job all the way around.
There were a couple of things that surprised me as I wrapped up the welding. The first was how much that beefy 3/8″ slab of steel distorted from the heat of the welder. By the time I was done, my sign had about a 1/4″ rise on each end. Thankfully, it didn’t twist at all. I couldn’t help but wonder if the sign on TV was actually flat either. The second surprise was just how much smoke I’d created in the process of welding these letters on. There was a haze hanging in the air like an old pool hall. I opened up the inside door of the shop and flipped on the vent fan. Next time, I’ll run the fan ahead of time.

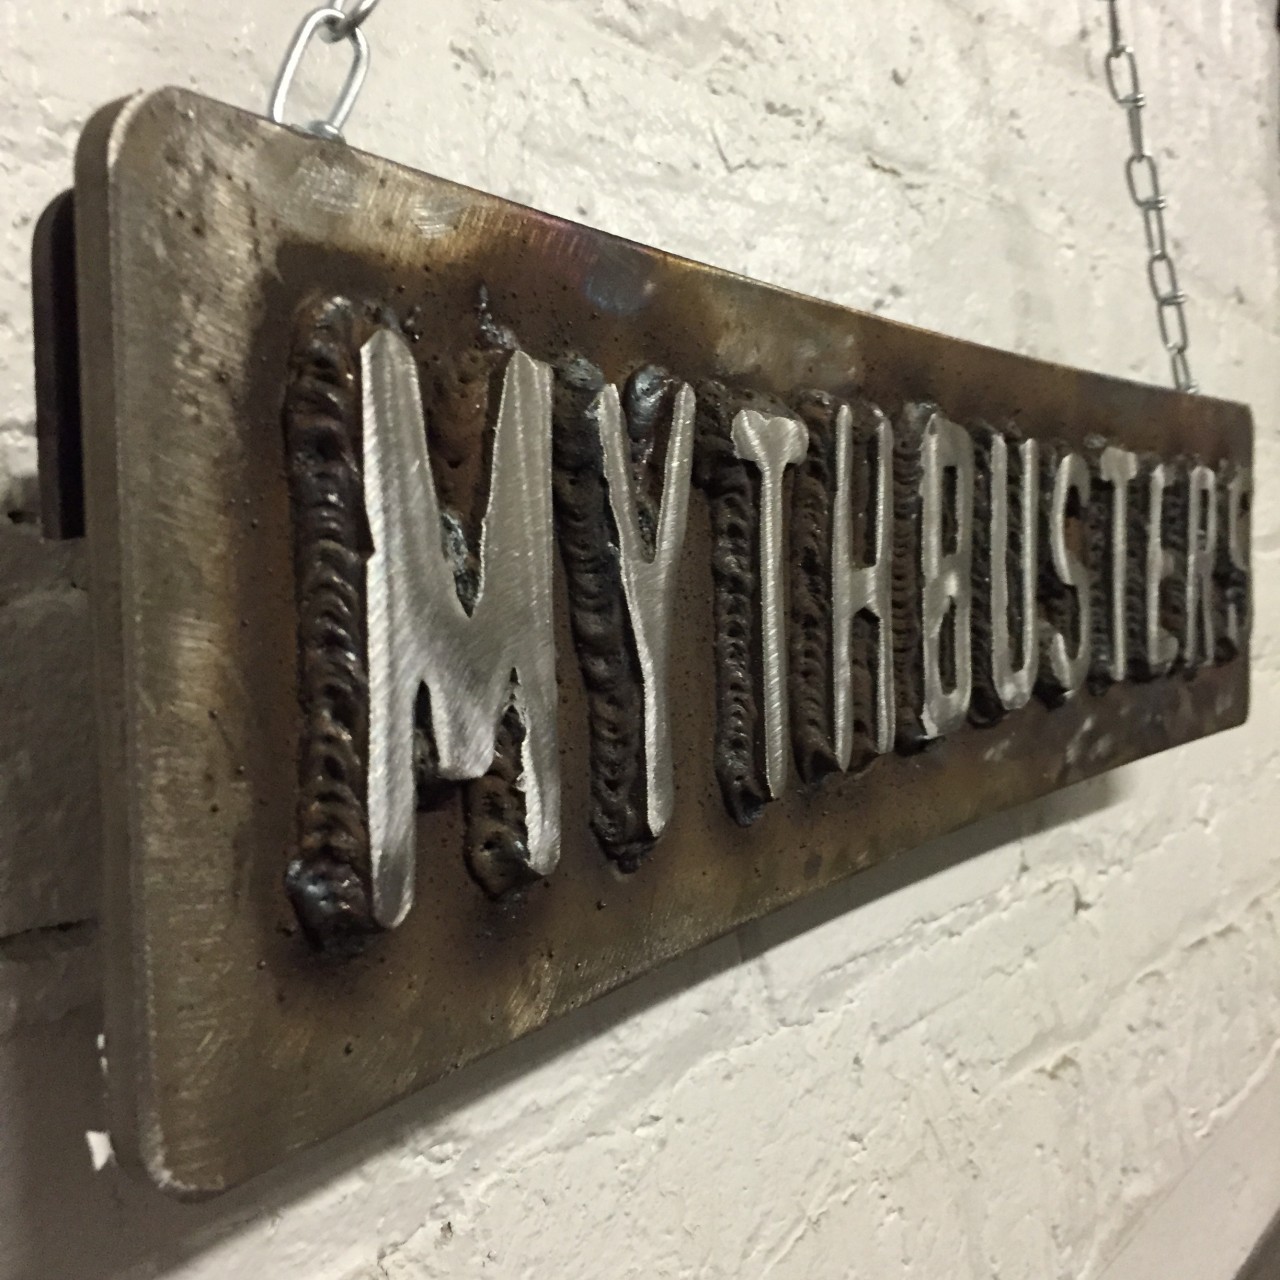
With all the welds finished and the sign beginning to cool, I was already pleased with the results. The cast off and heat discoloration had created that dark, splattered background we see on the sign on television. All that remained was to brighten the letters up in contrast. Back to my trusty flap wheel.
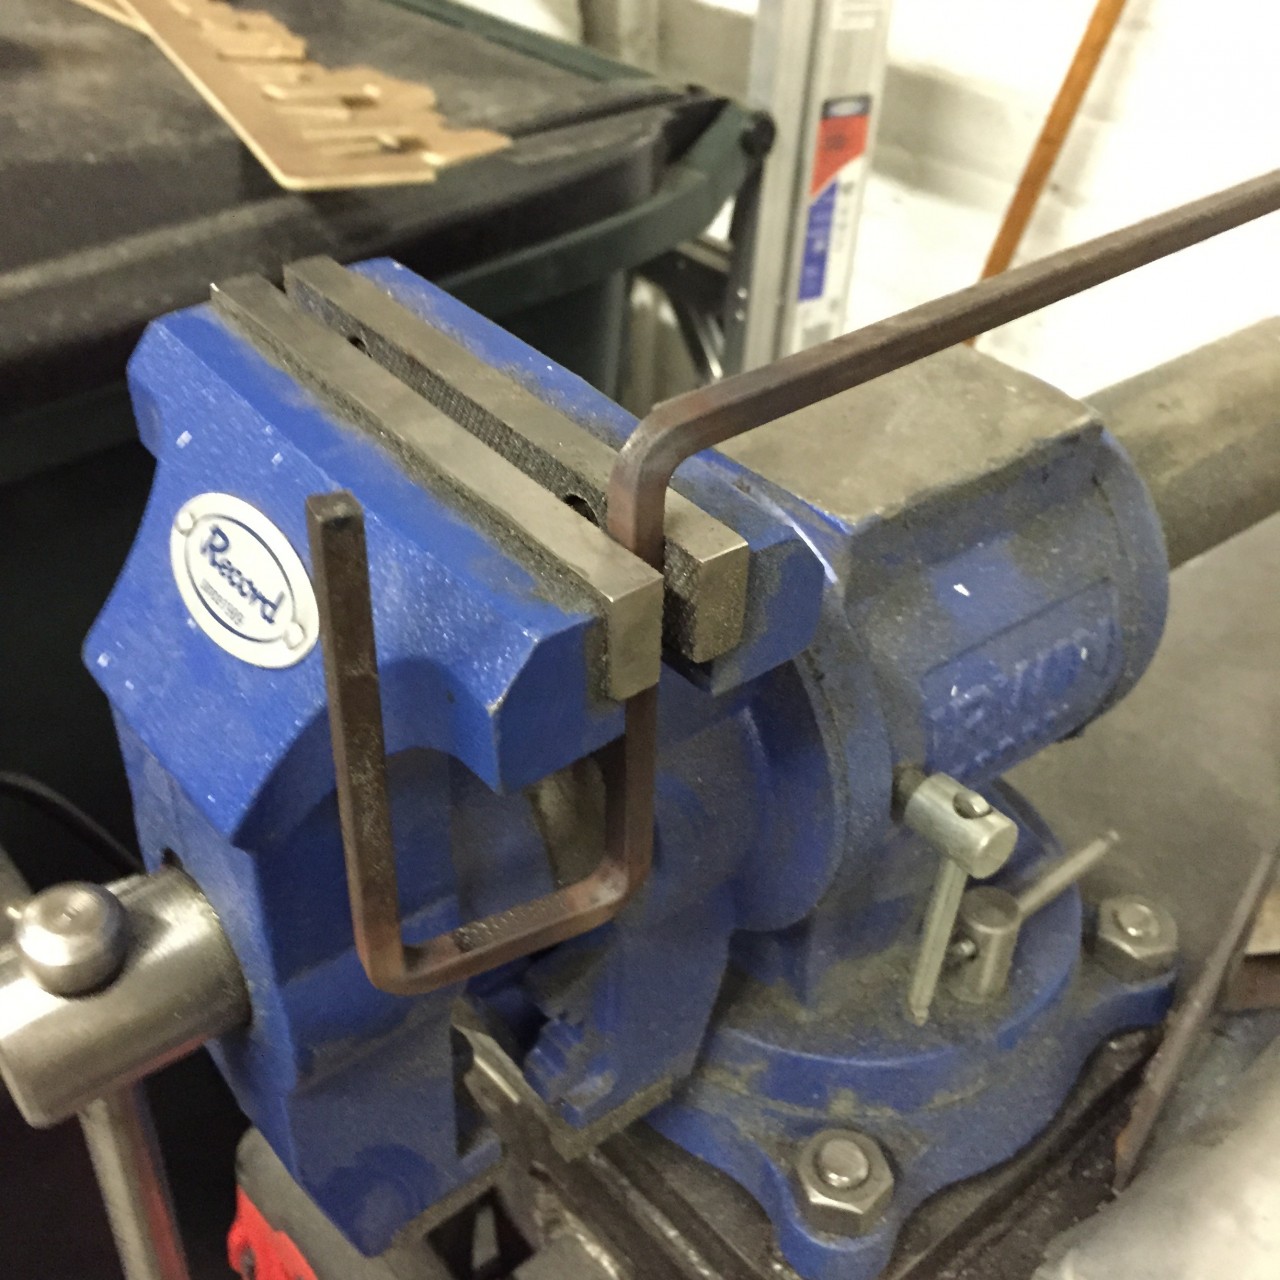
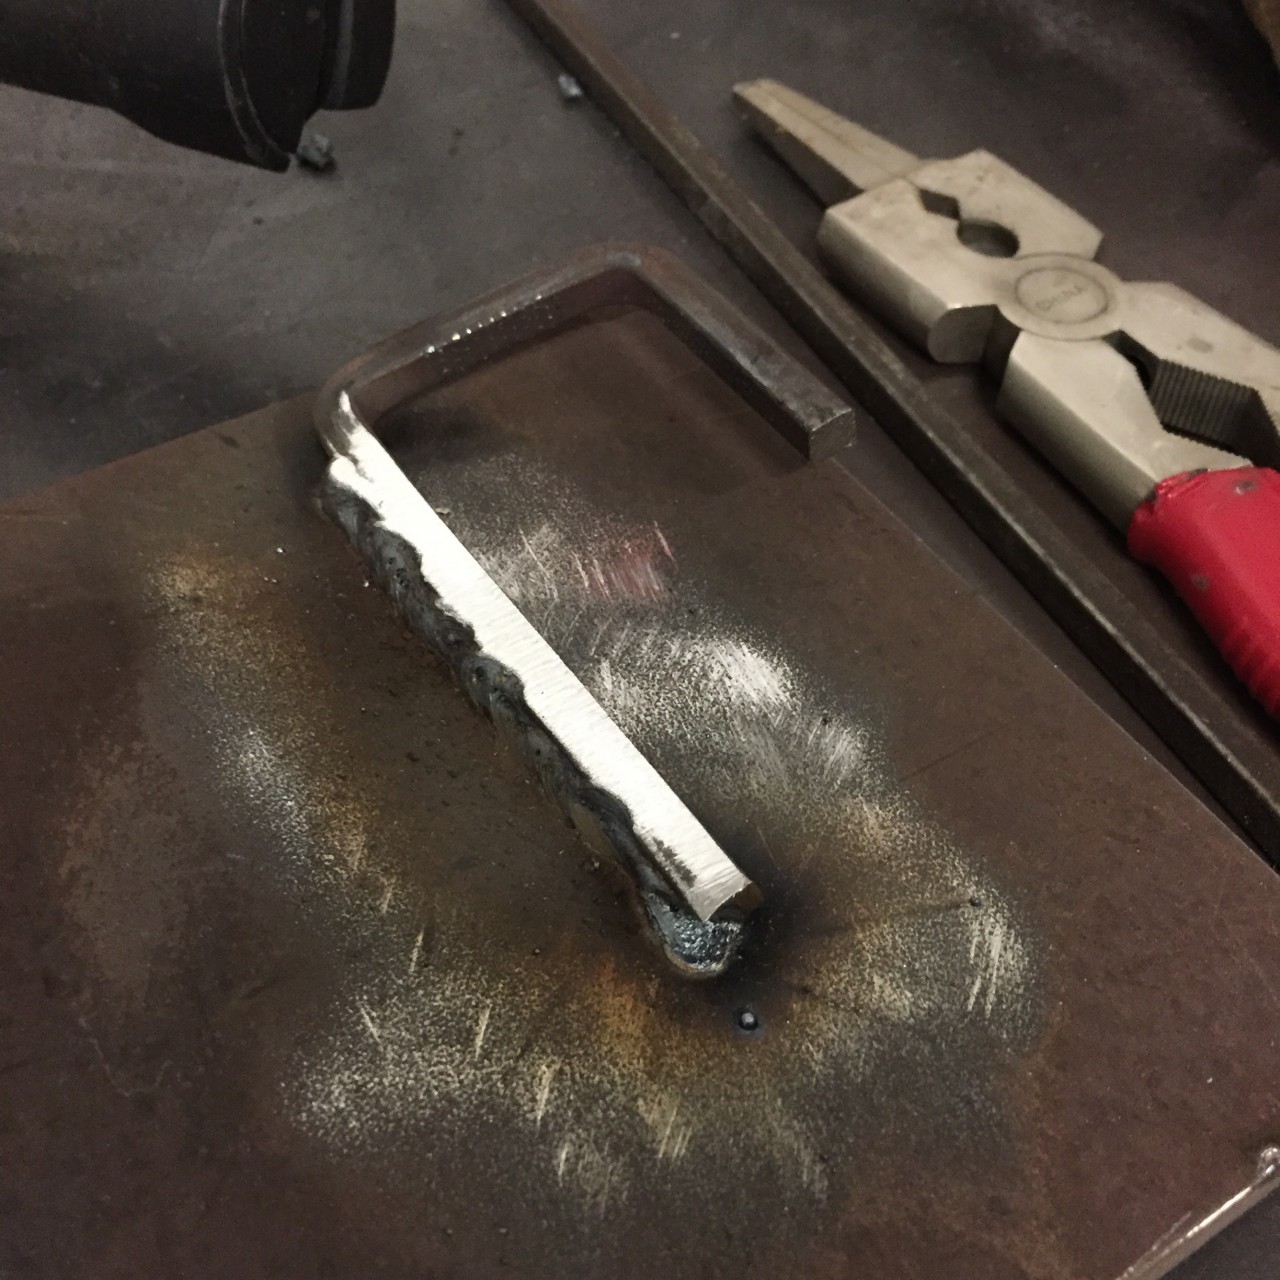
The final piece of the Mythbusters sign puzzle was to create a way to hang it. I’ve seen versions of the sign on the show where it has a metal chain attached to it. For my sign, I created a pair of hanger hooks out of 1/4″ square steel stock using just my MAP gas torch and my bench vice. This way I could take the chain on and off as needed. I eye-balled an S-bend in the steel, then cut that S in half using my Milwaukee portable band saw to form a pair of hooks. I then welded those two hooks to the back of the sign with a small gap to let me take the chain on and off. I attached a 3′ length of 130 lb rated double-loop chain from Home Depot and that was that. Done. Mischief managed. Myth busted. I really can finish a project all in one session.
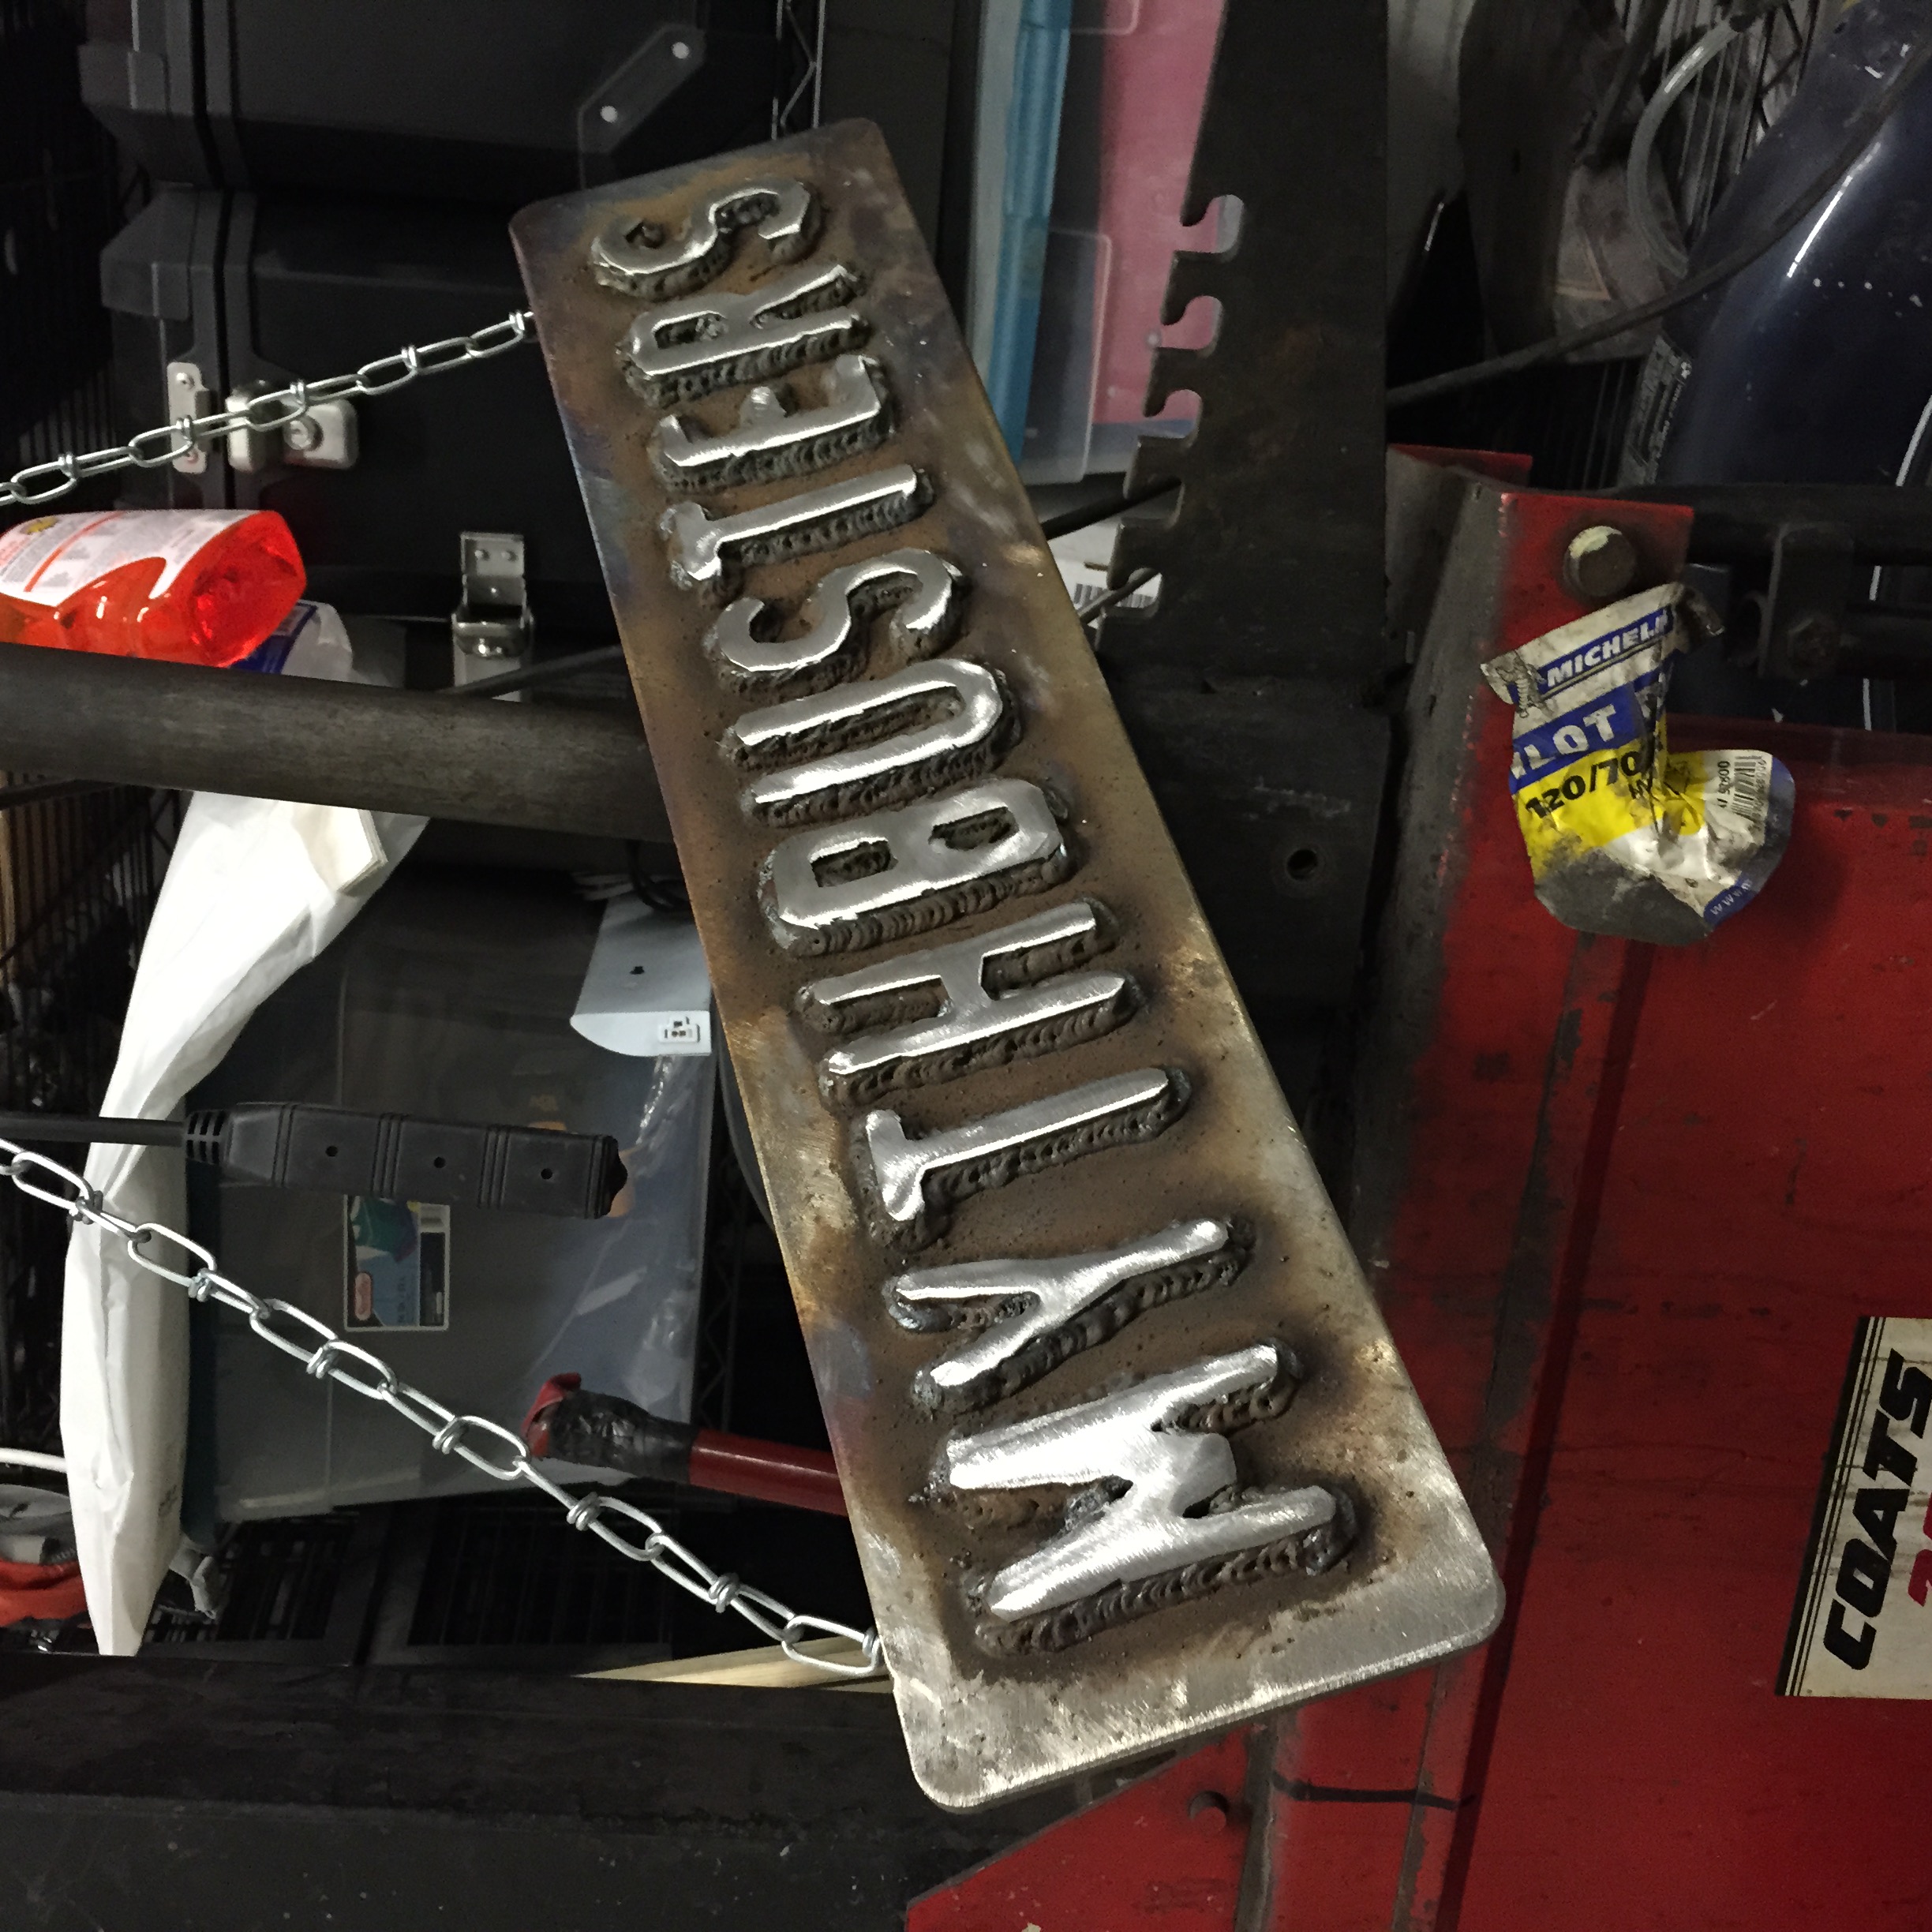
I took a few photos, then hung the sign on my tire machine for lack of anywhere else to put it. Stepping back, I could not have been more satisfied. My sign didn’t just look legit, it looked uncanny. It looked like almost too much like the sign I’d seen hundreds of times on television. What I’d made was so well grounded in the original that it looked genuine. This wasn’t a replica. This was a reproduction. This was almost a forgery of some kind. Along with that satisfaction of having hit my mark was that deeper satisfaction of simply being done.
It’s amazing how rarely I feel that way. Sure, some of that is the scale of the projects I take on. Yet the real shortage of feeling “done” is that in so many of the things I do professionally, “done” is rarely a concrete thing. There’s also often a dozen people who get to weigh in and decide after the fact that something isn’t done after all. That’s why I love these shop projects so much. As Matthew Crawford says in Shop Class as Soulcraft, “The motorcycle either runs or it doesn’t.”
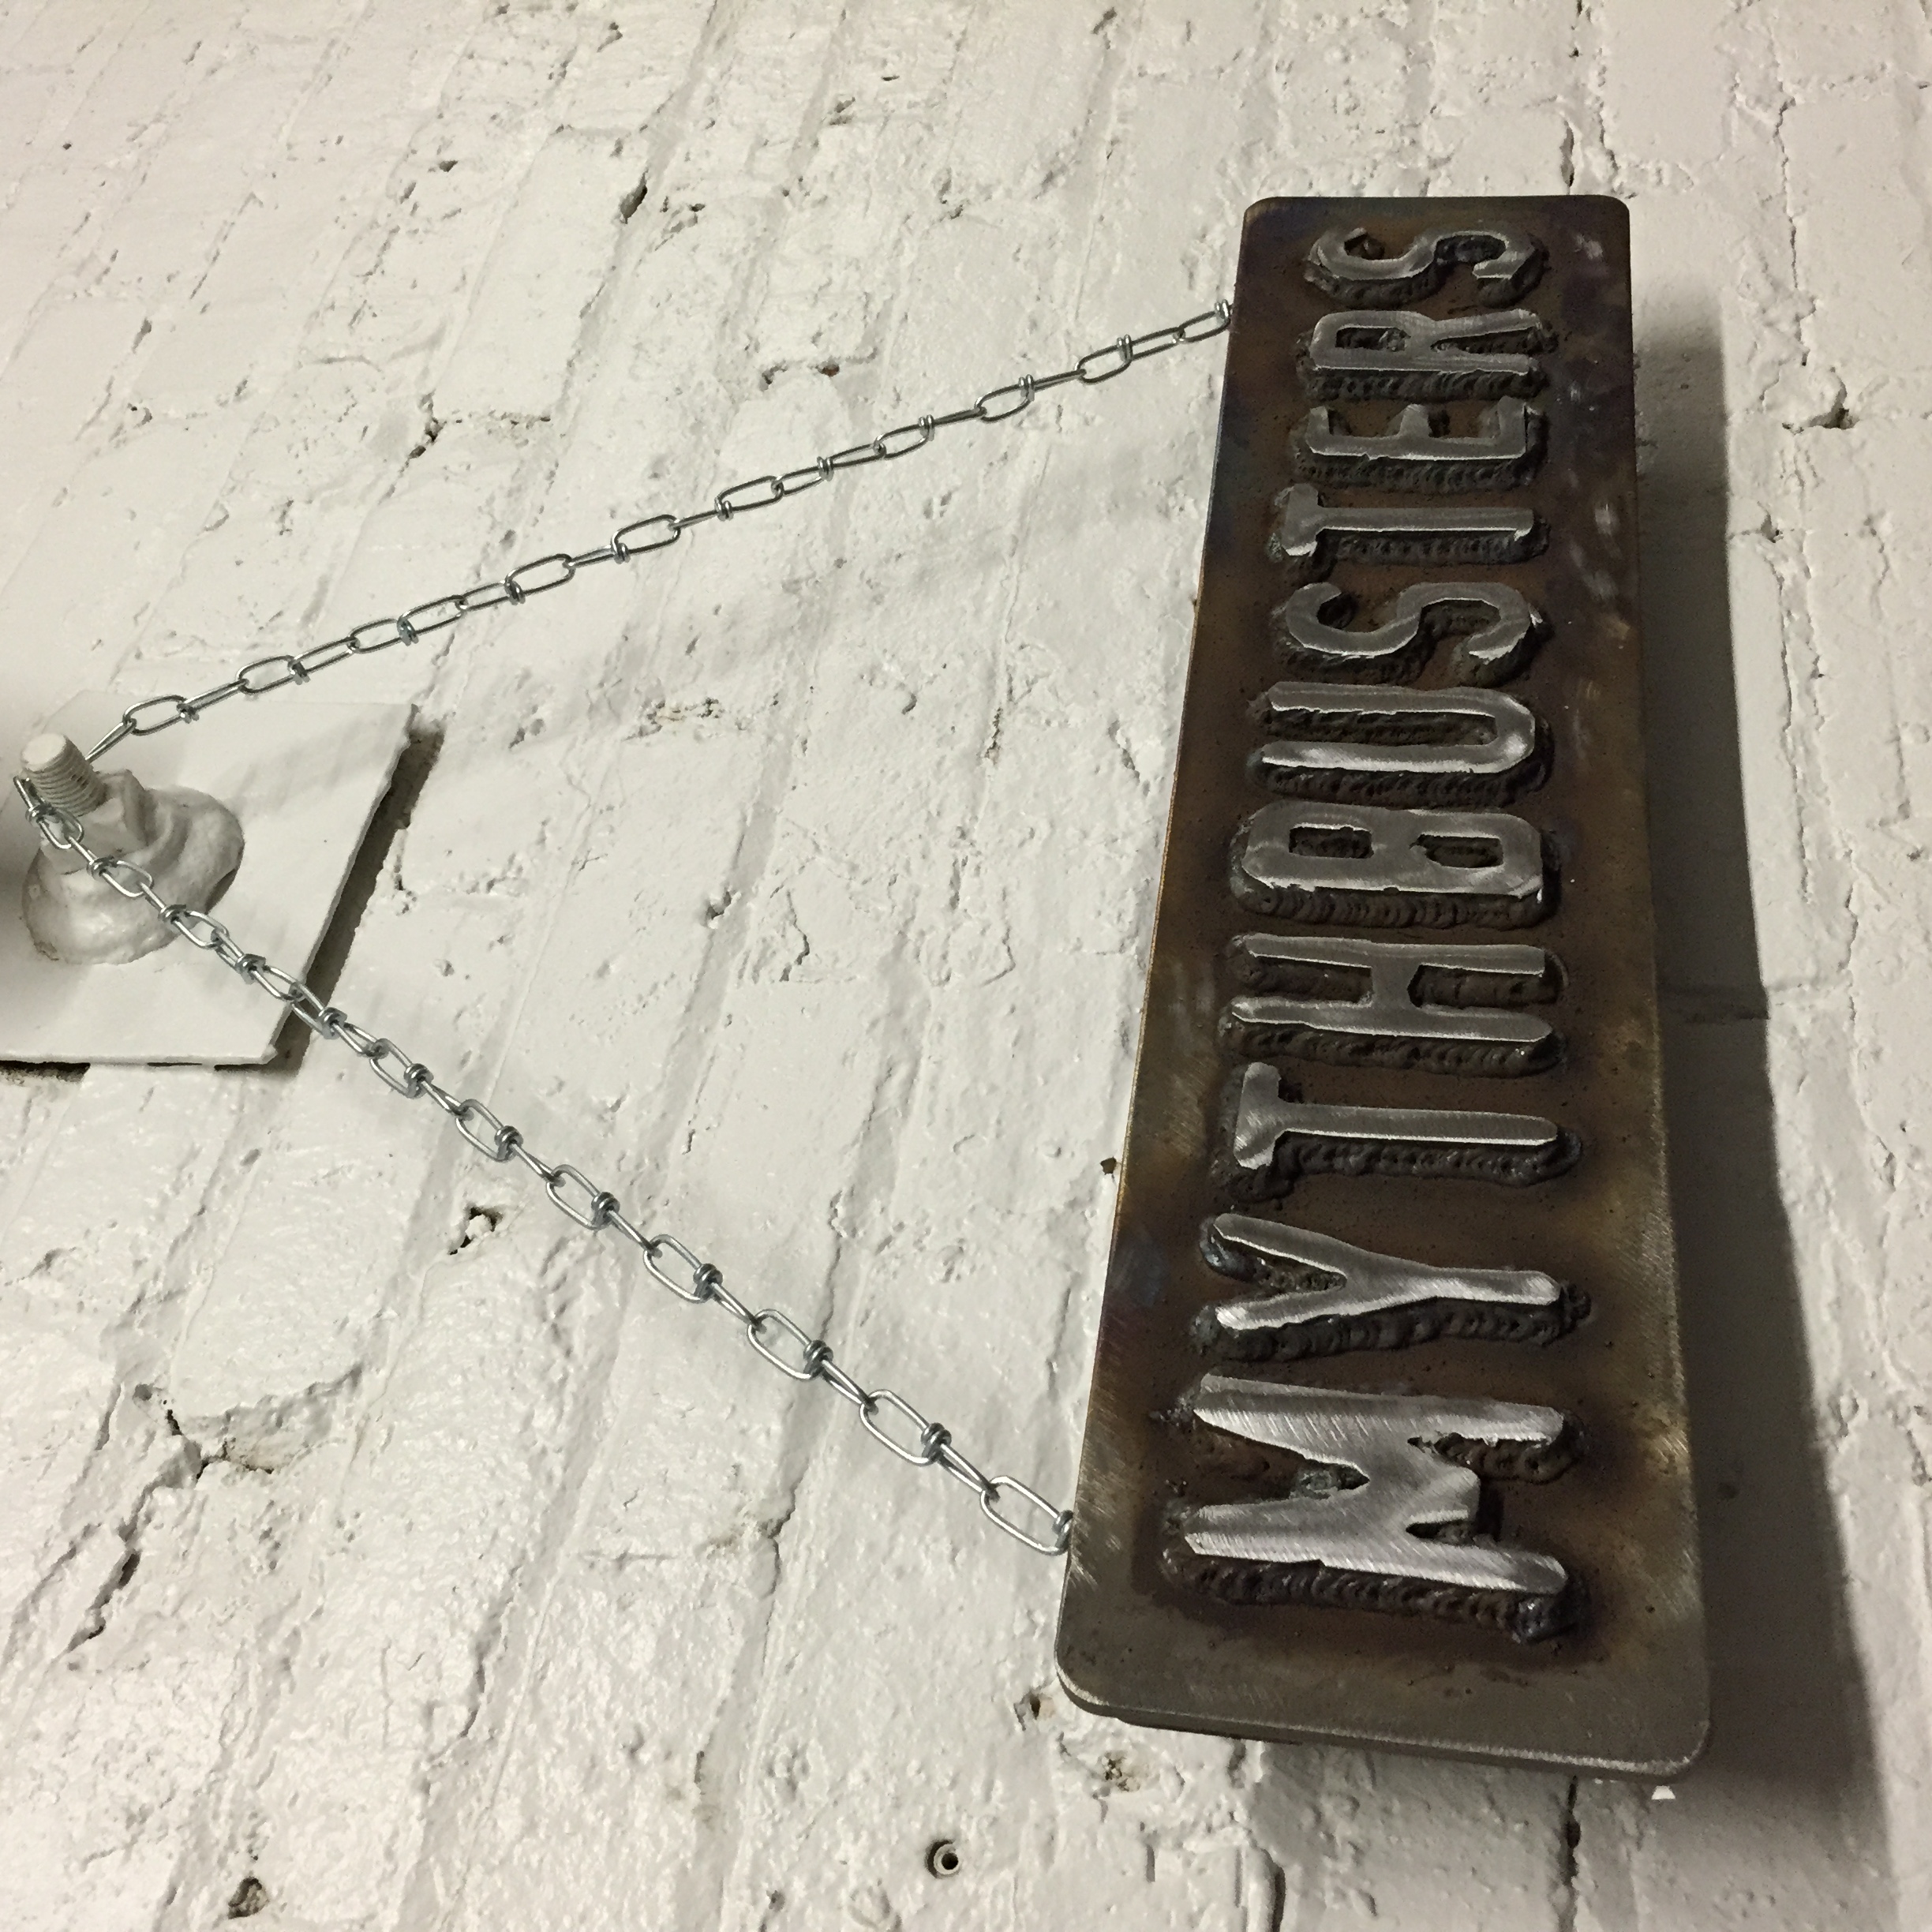
In this case, the sign was done. Done for real. I found a great spot on the wall where it could hang from a big beefy bolt coming out of our cinderblock wall. On my journey to being done, I’d not only successfully created an object of my own, but I felt a deeper connection to the original object. Not at some sort of spiritual level, but I now understood that original Mythbusters sign in a way that I couldn’t have understood it without building my own. There was the curve of the steel and the sheer weight of the thing (probably at least 30 lbs). Yet the most surprising thing that hadn’t occurred to me until I held my own Mythbusters sign in my hand was just what a filthy object it is. There’s rust and welding cast off and grit and grime. There’s no handling the thing without getting dirty. I watch things on TV and it never occurs to me the actual tactile experience of that object. Yet as I held the sign in my hands, I now understood the original object so much better. Even though I’ve never seen the real thing in person, I get it.
In the end, that’s the strange power of making things. I brought the object into being, yet the object took me somewhere.